Table of Contents |
Web forms can be a powerful tool for gathering information and data from a website visitor. However, once the form is built in HTML and stylized with CSS, what next? What happens to the data after the user clicks the form’s “submit” button, and how does it get into a database and generate a confirmation email?
The answer is that a server-side scripting engine and script code file on the server receive the form submission data as an HTTP request and process the data by extracting the field values from the request. The script can then process the values and do whatever is needed:
Remember that when a web form is submitted, the contents of the form fields are packaged into an object. The object then gets put into an HTTP request object and sent to the server. On the server side, when using PHP, the data comes through as an object containing key/value pairs. The keys are the names of the fields (as specified in the HTML “name” attribute of the input tags), and the values are what the user entered or selected.
To access the values, we can reference either the $_POST or the $_GET object, depending on which HTTP method the form used (as specified in the HTML “method” attribute of the form tag). The following examples all use the GET method; POST will be discussed in the following section.
EXAMPLE
Retrieving data from $_GET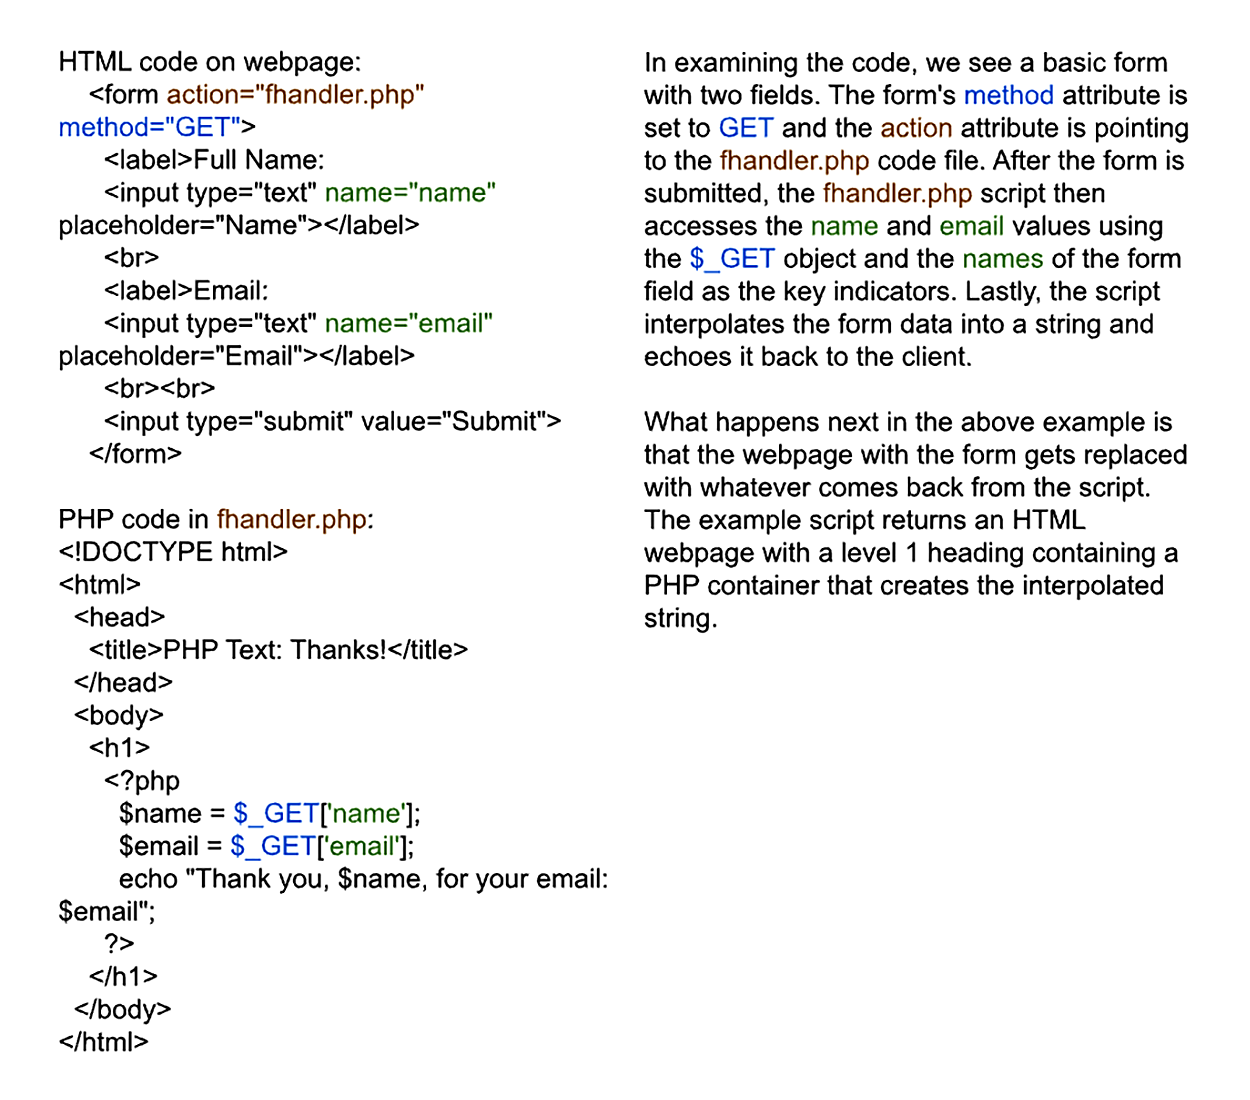
But what if we wanted the user to remain on the same page after submitting the form? This would be helpful because it allows the PHP script to report errors to the user and give them a chance to resolve the issue in the form. Furthermore, in such cases, we can reuse the data from the original submission attempt to repopulate the fields so that the user does not need to retype everything in case of an error.
In order to do this, we need to include a couple of changes to the webpage. First, the page will need to be saved as a .php file. Second, we need to make some changes to the form’s action attribute. And finally, we can use PHP to detect a form submission, process the submission to generate the response message, and update the field’s value attribute with the submitted data.
EXAMPLE
Submitting a form to itself<body>
<div id="results">
<?php if(isset($_GET['submit'])) {echo "Thank you, {$_GET['name']}, for
your email: echo {$_GET['email']}";} ?>
</div>
<div>
<form action="<?php echo htmlspecialchars($_SERVER["PHP_SELF"]); ?>"
method="GET">
<label>Full Name:
<input
type="text"
name="name"
placeholder="Name"
value="<?php if(isset($_GET['name'])){ echo $_GET['name'];} ?>">
</label>
<br>
<label>Email:
<input
type="text"
name="email"
placeholder="Email"
value="<?php if(isset($_GET['email'])){ echo $_GET['email']; }?>">
</label>
<br><br>
<input type="submit" name="submit" value="Submit">
</form>
</div>
</body>
Notice the five changes to the form’s webpage:
isset( $_GET['name']). The PHP function isset( ) returns “true” if the object or variable does indeed exist. In this case, if the page was loaded for the first time, then isset() should return a “false,” leaving the field blank. Otherwise, if the form had been submitted, then the variable would exist, and isset() would return “true.” echo $_SERVER["PHP_SELF"]. $_SERVER["PHP_SELF"], and to get around this vulnerability, we simply need to wrap the command in the htmlspecialchars() function. $_POST
The object containing all of the information that was submitted from an HTTP POST request, typically used to retrieve data from a submitted web form.
$_GET
The object containing all of the information that was submitted from an HTTP GET request.
One thing you may have noticed if you attempted the code from the previous section is that your data from the form is displayed right in the navigation bar as part of the URL!
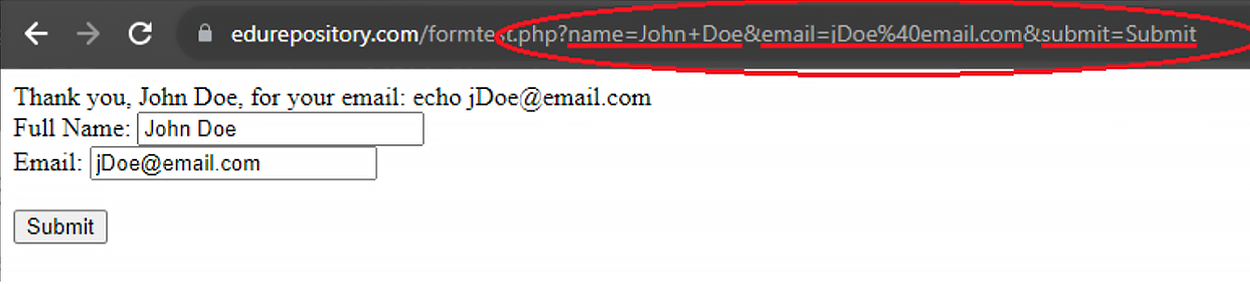
This would pose a massive security concern, especially when transmitting sensitive personal data and information. This is due to the fact that even though you may be on an encrypted connection, the request URL itself is still clearly visible. To ensure that the data within the form gets encrypted, we need to swap the HTTP GET method for the POST method.
Making this switch is actually easy when dealing with web forms. All you need to do in order to use the GET method is to swap GET for POST anywhere in your code. On the front end, the form’s action attribute will be changed to POST, and on the back end, any reference to $_GET needs to simply be swapped with $_POST.
EXAMPLE
Submitting a form securely using POST<body>
<div id="results">
<?php if(isset($_POST['submit'])) {echo "Thank you, {$_POST['name']}, for
your email: echo {$_POST['email']}";} ?>
</div>
<div>
<form action="<?php echo htmlspecialchars($_SERVER["PHP_SELF"]); ?>"
method="POST">
<label>Full Name:
<input
type="text"
name="name"
placeholder="Name"
value="<?php if(isset($_POST['name'])){ echo $_POST['name'];} ?>">
</label>
<br>
<label>Email:
<input
type="text"
name="email"
placeholder="Email"
value="<?php if(isset($_POST['email'])){ echo $_POST['email']; }?>">
</label>
<br><br>
<input type="submit" name="submit" value="Submit">
</form>
</div>
</body>
Testing the above script, we get the exact same results on the page, but no data has been added to the URL:
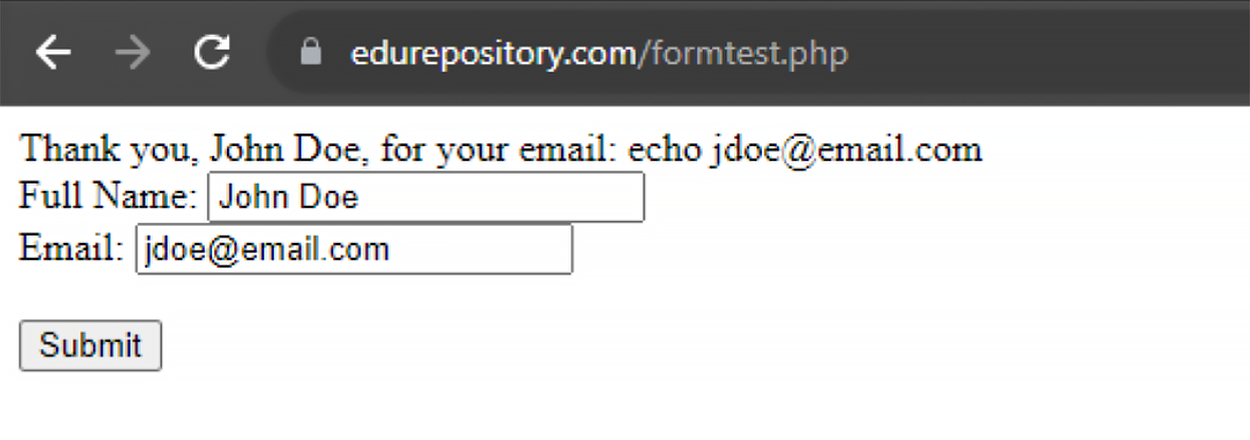
The data has instead been placed inside of the “body” of the HTTP request as a payload. This ensures that the data from the form gets properly encapsulated and thus encrypted as the payload of the HTTP request.
Payload
The portion of an HTTP request that contains the actual data being communicated.
Source: This Tutorial has been adapted from "The Missing Link: An Introduction to Web Development and Programming " by Michael Mendez. Access for free at https://open.umn.edu/opentextbooks/textbooks/the-missing-link-an-introduction-to-web-development-and-programming. License: Creative Commons attribution: CC BY-NC-SA.