Table of Contents |
In this lesson, we will talk about sharing documents and collaborating online. While the norm was once emailing files back and forth, the norm now is to have a single file that all collaborators can access.
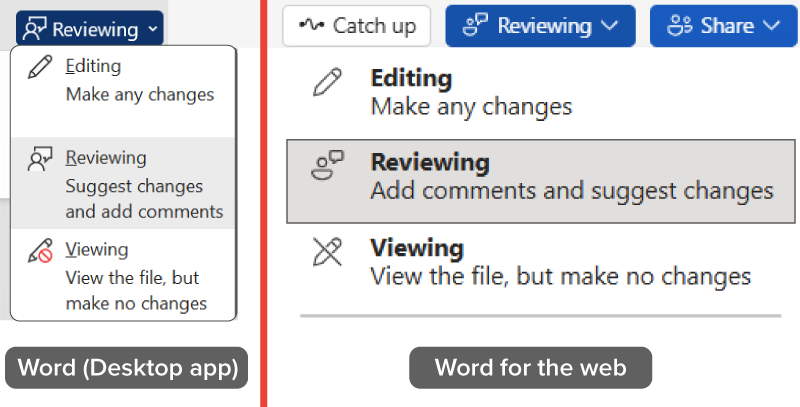
There are three basic modes that users can use when they are collaborating online. When the creator of the document shares the file they can decide what level of access each collaborator should have.
In both the desktop app and Word for the web, you can check or change your mode from the Mode menu in the upper-right corner of the window. The image below compares the menu options in each version, along with what each allows you to do.
When working on a shared document, you may want to offer feedback or edits without changing the text directly. Most office tools support this through two features: comments and suggestions.
The table below explains these features.
| Tool | What It Is | Typical Steps (Google Docs/Microsoft Word Online) | Where It Appears | Effect on Document | When to Use It |
|---|---|---|---|---|---|
| Comment | A note linked to specific text that gives feedback without changing the original content |
|
In the margin or sidebar | Text stays the same. | For asking questions, making reminders, or general feedback |
| Suggestion | A proposed edit that appears in-line, which the author can accept or reject |
|
In-line with document text | Shows proposed changes without editing the final text. | For rewording, fixing, or improving specific sentences |
After addressing comments, resolve them to keep the document clean while preserving a record in the comment history.
Steps to resolve a comment:
When multiple people edit a shared document, it is important to track who changed what. The Track Changes feature highlights all edits—like added or deleted text—without changing the original content right away. This keeps the process clear and lets everyone review and approve changes before they are finalized.
The table below explains how tracked edits appear in a document.
| Change Type | How It Appears | Example |
|---|---|---|
| Added text | Shown in color (such as blue or green) | Please find your invoice of January 14, 2025 attached. |
| Deleted text | Appears crossed out or with a strike-through |
Please remit payment |
| Edits by different people | Color-coded and labeled changes by each person | This account is now six months past due. As such, we cannot process further orders until your account is paid in full. |
EXAMPLE
When Shyama added a sentence to the team report, it appeared in blue text, while Minho’s deleted phrase showed up with a red strike-through and a comment bubble in the margin.The Review tab in Microsoft Word displays all the tools needed to track, review, and manage edits, such as turning on Track Changes and accepting or rejecting suggestions.
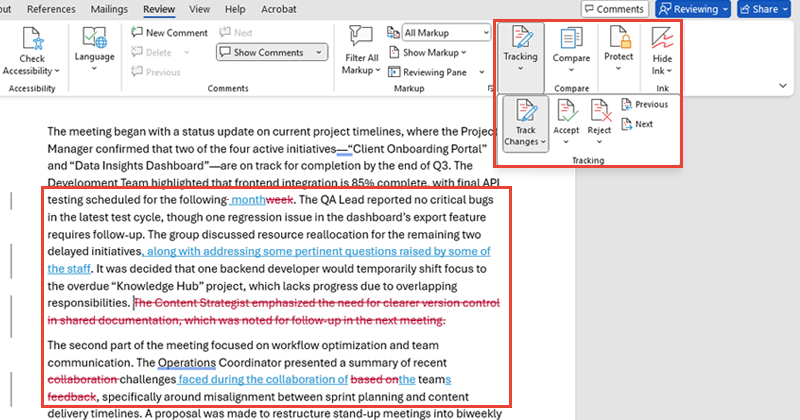
To use Track Changes, you will need to turn it on in your application. While the tools may use different names, the goal is the same: to help you propose edits without altering the original version.
In the screenshot below, Track Changes is turned on, and the Tracking group is expanded to show tools for navigating, accepting, or rejecting edits. Markups appear directly in the document.
The table below shows how to turn on Track Changes in Microsoft Word and Google Docs.
| Tool | How to Turn It On |
|---|---|
| Microsoft Word | Go to the Review tab and click Track Changes. This tracks all edits as you type. |
| Google Docs | Click the Editing drop-down menu in the top-right corner and choose Suggesting mode. This marks edits for review. |
Once edits are tracked, the next step is to resolve them. In this case, resolving means reviewing each change and choosing whether to accept or reject it. This is different from resolving a comment, which simply hides the conversation.
EXAMPLE
A team lead reviews tracked changes in a report and accepts the final edits before submission.The table below outlines the actions you can take when reviewing changes.
| Action | What It Does |
|---|---|
| Accept | Keeps the change and applies it to the document |
| Reject | Removes the change and keeps the original version |
| Review step-by-step | Lets you view and make decisions regarding each change one at a time |
| Accept/Reject All | Applies or removes all changes at once (use with caution) |
| Use the Review Pane | Shows a list of all edits and comments for easier navigation |
Tracking and resolving changes helps ensure accuracy, encourages collaboration, and gives everyone a voice, without losing control over the document’s final version.
When collaborating on a shared document, it is easy to make changes you later want to undo. Version history acts like a rewind button, giving you a clear timeline of your document’s development.
Version history lets you do the following:
EXAMPLE
After deleting a section by mistake, Kai used version history to restore an earlier version of the document and recovered everything.Many cloud-based tools automatically create versions for you—you do not have to click “Save As” or rename files manually. The process of saving and accessing the version history can vary slightly between tools.
The table below shows how version history works in two common platforms.
| Tool | How It Saves Versions | How to View or Restore |
|---|---|---|
| Google Docs | Saves a version every few minutes during active editing | Click File → Version history → See version history |
| Microsoft Word Online | Automatically saves versions based on editing activity, time intervals, and collaboration patterns | Click File → Info → Version History |
The screenshot below shows Google Docs’ version history, where you can select a time stamp and click “Restore this version” to revert changes.
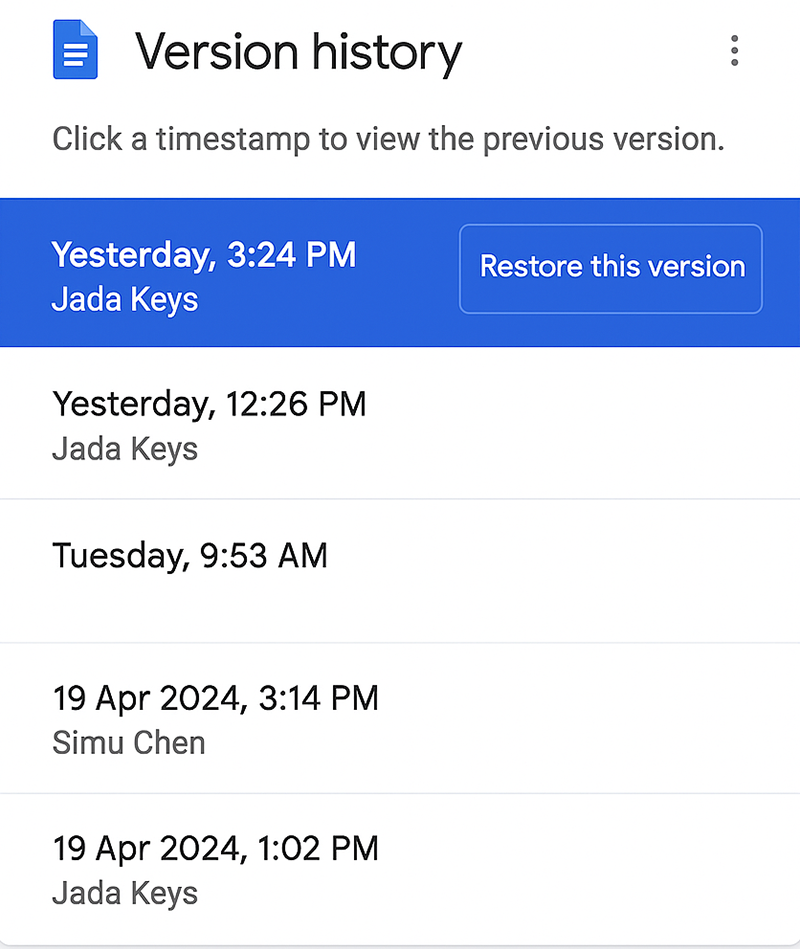
Both platforms also display the date, time, and editor name for each version. You can preview older versions, compare them side by side, or choose to restore an earlier one.
Restoring will replace your current version, so it is often best to make a copy first if you want to retain the most recent changes.
In the tutorial Collaboration and “the Cloud,” you were introduced to real-time coediting, which lets multiple people work on a document in the cloud at the same time. Now, you will learn how to use those tools in practice.
Live collaboration speeds up teamwork by letting everyone edit the same document instantly. It helps collaborators work smoothly, know who is in the file, coordinate edits, and use the built-in chat or comments.
When you open a shared document in a cloud tool like Google Docs or Microsoft Word Online, you might notice small profile pictures or initials at the top. These are called presence indicators—they show who else is currently viewing or editing the file.
EXAMPLE
While working in Google Docs, Idris saw a teammate’s profile picture in the top-right corner—indicating someone else was editing the file.You can also see others typing in real time, with each person’s edits shown in a different color and labeled with their name. This helps avoid overlap and keeps things clear.
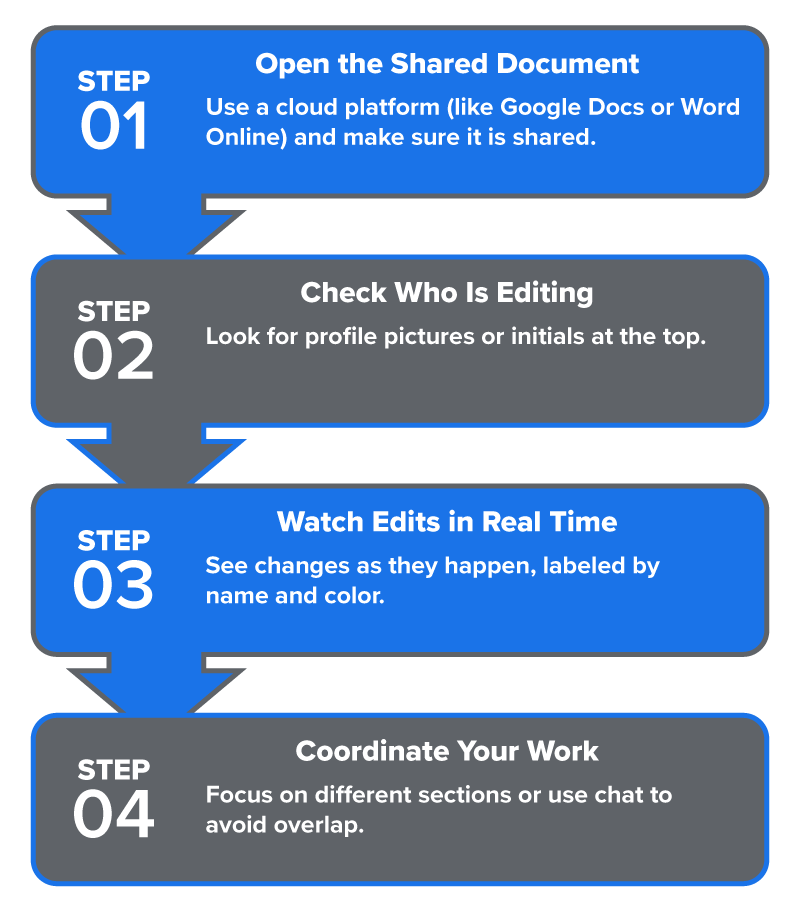
The flowchart below outlines the four key steps for live collaboration in a shared document.
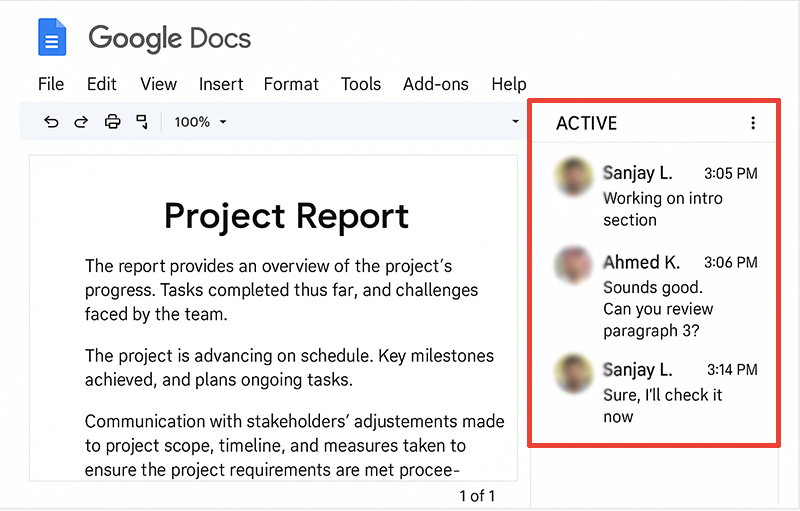
In addition to typing together, many cloud platforms include a document chat feature. This allows you to send quick messages inside the file without switching to email or another app.
The chat usually appears in a sidebar—a panel on the side of the document window that also contains tools like comments, tasks, or version history. Unlike comments (which attach to specific text), the chat is used for more general messages like “I’m almost done with Page 2.”
The table below explains how to use the chat feature during live collaboration.
| Action | What to Do |
|---|---|
| Open the chat panel. | In Google Docs, click the chat icon in the top-right corner (available only when others are present). In Microsoft 365, use linked comment threads within the document or open Teams separately for chat communication. |
| Send quick messages. | Use the chat to give updates like “I’ll take the conclusion” or ask questions like “Ready to review now?” |
| Keep the chat focused. | Use it for general coordination. Use comments if your message relates to specific text. |
The screenshot below shows the chat sidebar in Google Docs, where collaborators can exchange quick messages during live editing, such as updates or coordination notes.
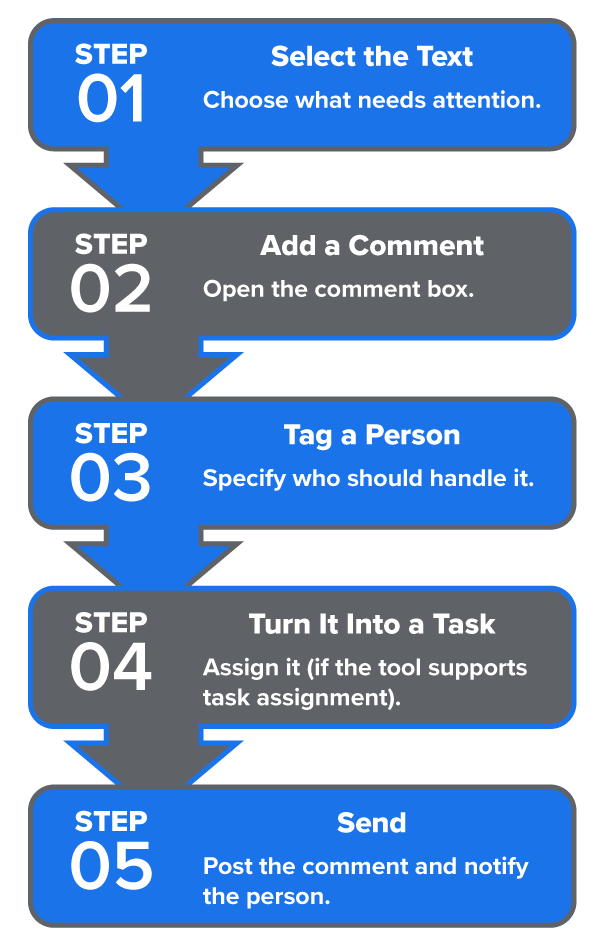
In shared documents, you can assign tasks to teammates without leaving the file. This keeps everyone clear on what needs to be done and where.
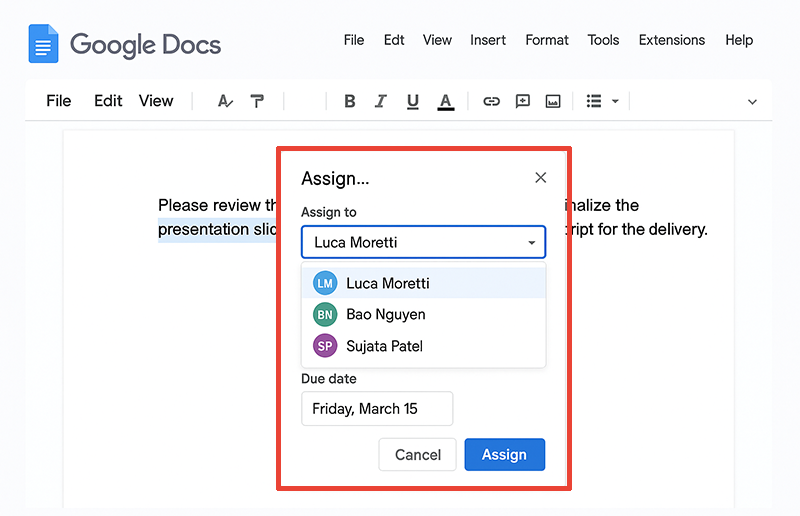
A task is a small job linked to part of the document—like reviewing a sentence or adding a missing detail. You can assign it to someone, set a deadline, and track progress—all inside the document.
The flowchart below shows the steps to assign a task in a shared document.
The screenshot below shows the task assignment feature in Google Docs, where you can choose a teammate, set a due date, and assign a comment as a task directly in the document.
Source: THIS TUTORIAL HAS BEEN ADAPTED FROM OPENSTAX "WORKPLACE SOFTWARE AND SKILLS." ACCESS FOR FREE AT OPENSTAX.ORG/DETAILS/BOOKS/WORKPLACE-SOFTWARE-SKILLS. LICENSE: CREATIVE COMMONS ATTRIBUTION 4.0 INTERNATIONAL. Accessed by June 2025.