Table of Contents |
Images are some of the more impactful elements that we can include in a website. There are two methods to include images: the HTML <img> tag and the CSS background-image tag. While the CSS approach will be covered in a later unit, we will discuss the <img> tag and the attributes used to control how it is rendered on the page.
Adding images to a webpage using HTML requires the use of the <img> tag and the required “src” source attribute. The src attribute includes the web path that points to the image file. The common convention is for image files to be located in a folder named “images.” Additionally, the height and/or width attributes can be specified, along with an “alt” alternative attribute.
EXAMPLE
<img src="images/logo.jpg" height="200" width="200" alt="Good Harvest Bakery Logo">
While the “alt” alternative attribute is not required for the image to be displayed, it is an accessibility requirement that describes the content of the image for users with visual impairment. Alt attributes also offer a benefit for search engine optimization by providing text that search engines can read.
If the image contains no important information and is purely decorative, then this attribute should still be included. One option is to create an empty set of quote marks as the attribute’s value.
EXAMPLE
<img src="images/computer.jpg" height="200" width="200" alt="">
Web developers may also choose to include the word “decorative” in the alt attribute to confirm the intention of the image to site visitors.
EXAMPLE
<img src="images/computer.jpg" height="200" width="200" alt="Decorative">
If an image is necessary to convey a specific meaning, then a brief description of the contents of the image should be provided. This is particularly important if the image contains information that is critical to the understanding of the page content. Diagrams and figures often fall into this category.
Web developers should take some time to become familiar with the way that screen reader software functions so they can write better alt text. An image of Mount Everest might include the alt tag “Mount Everest” and does not need a leading phrase “photo of” or “image of” as screen readers already say this. Note that the alt text for logo images can be simplified and does not need to describe the contents of the logo.
EXAMPLE
<img src="images/logo.jpg" height="200" width="200" alt="Good Harvest Bakery Logo">
The height and width attributes are used to specify or override the original height and width of the image. This should be used with caution as not all image types can be scaled up without losing quality.
EXAMPLE
If the image is 100 pixels high and 100 pixels wide, and you set the height and width attributes to 200 each, the image will be scaled up to be 200 x 200 pixels.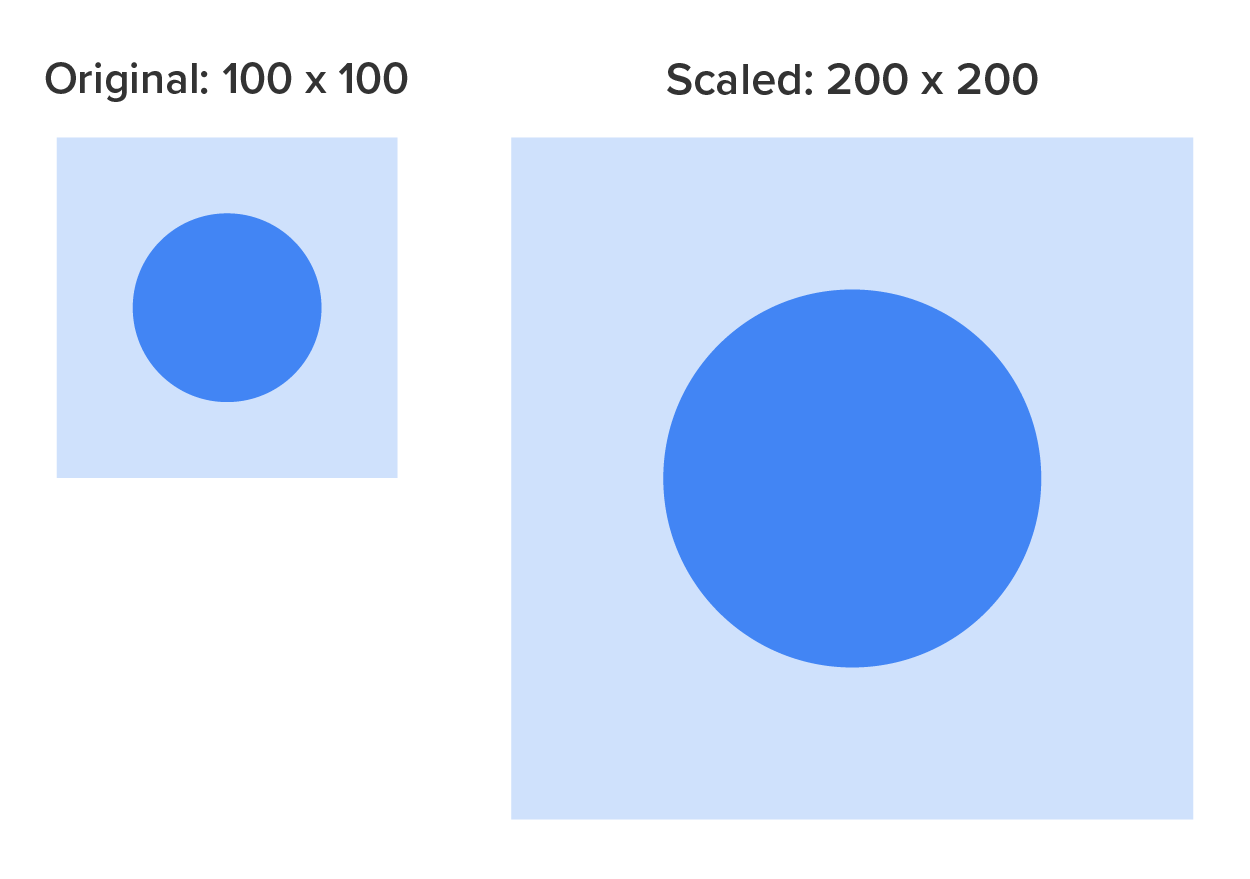
Use caution when setting the image height and width as you run the risk of skewing the image by stretching it unnaturally. Aspect ratio is the ratio of an image’s height to its width. When resizing images, the aspect ratio should be maintained by scaling both the height and width equally. If you assign the wrong height and width value for the image, the image may end up appearing stretched.
EXAMPLE
If your image is 100 x 100 pixels, and you use a height of 150 and a width of 100, the image will look vertically stretched.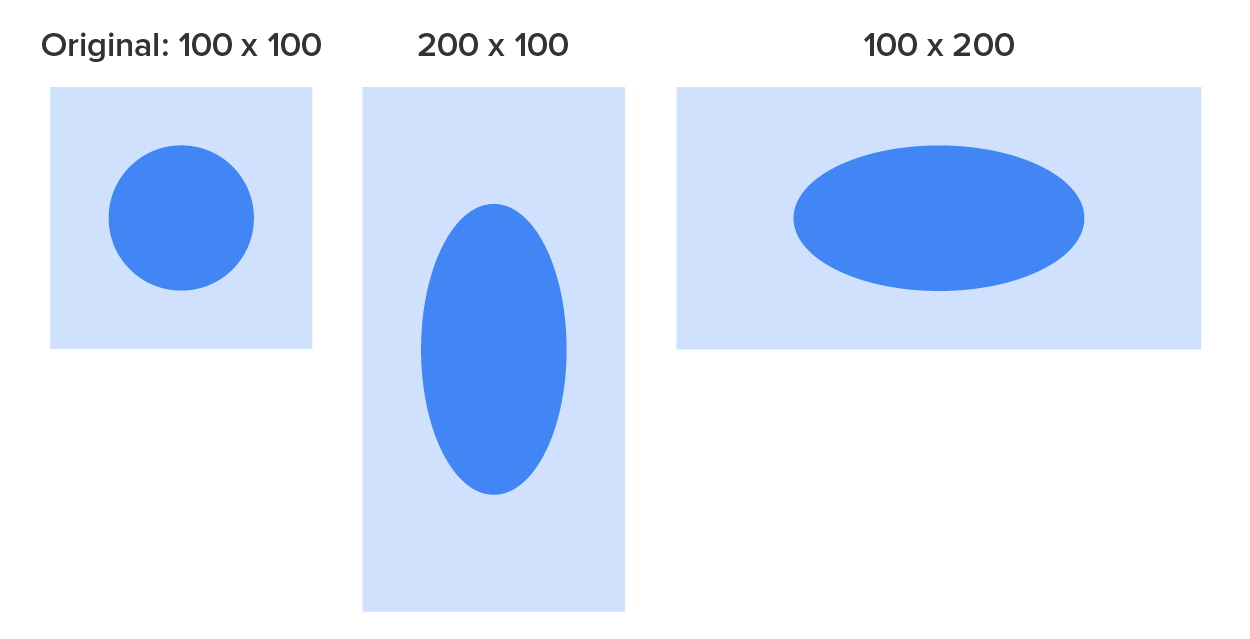
The better option is to provide just one value, height or width, as the browser will automatically scale the other dimension to maintain the image’s aspect ratio.
While there is the option to control the size of an image using the HTML height and width attributes, these attributes are being deprecated, and it is recommended to use CSS to control the height, the width, and the rest of an image’s format. The information above about maintaining the aspect ratio and scaling up images from their original size still applies; the difference is that you will control how an image is rendered using CSS style rules in either the external stylesheet or the embedded/internal stylesheet.
The other HTML tag that can be used to include images in a webpage is the <svg> tag. While using the <svg> tag to create vector images will be discussed in a later tutorial, it is worth noting here that <svg> tags are also used to create images in HTML.
Now that you have learned how to embed images into your webpages using the <img> tag, it’s time to try it yourself.
Directions:
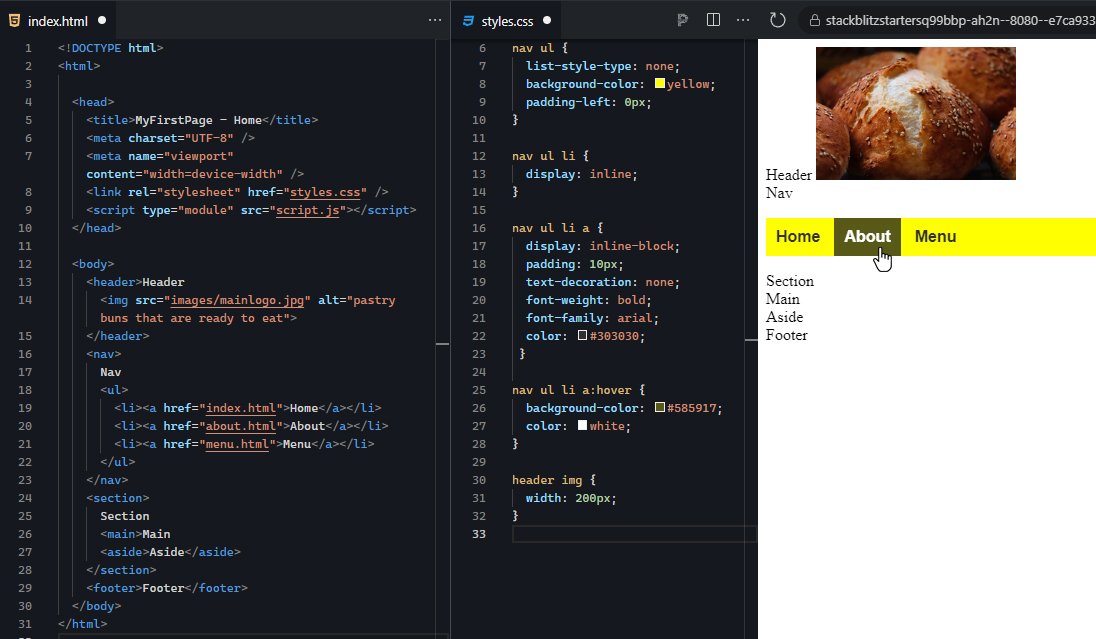
8. If you haven't already done so, now is a good time to save your project.
Being able to include images in a website is a daily simple operation that can have a massive impact on the perception of the website, both positive and negative. Make sure to focus on images that have a purpose and carry the message forward. Also, make sure to examine how images are used on other websites. For example, we just added an image into the header section using the <img> tag; however, often, you will find that an image is used as the entire background of the header section and is usually done using CSS. You will practice this later in the next challenge.
You will be expected to embed images into your Touchstone Task.
View the following video for more on the HTML image height and width attribute.
Aspect Ratio
A proportional relationship between an image or screen’s width and height.
Images are subject to copyright laws and regulations. The basic idea of copyright laws for images is that once you create an image, such as taking a photo or drawing or painting an image, you own that image and are automatically granted copyright to that image. Images that you find on the web are most often copyrighted, and the owner reserves the right to control the use of the image. In fact, unless otherwise specified, it is safe to assume this about any image you find online.
Owners of images can release their copyrights to an image by posting the image along with a label marking the image as “Creative Commons.”
If you see the Creative Commons symbol, you know that, at a minimum, you are allowed to distribute the image worldwide for non-commercial purposes and without modification.
EXAMPLE
This is the Creative Commons symbol:
Additionally, you will likely see other icons along with the Creative Commons icon that indicate additional released rights or requirements for use.
| Icon | Description |
|---|---|

|
Attribution (BY) is required. While you may be able to copy, distribute, display, perform, and make derivatives of the work and any remixes of the work, you must give the author or the licensor credit. If this symbol is present, you will need to provide credit to the author by listing their last name or username, the year the image was originally posted, and what site or service the image was obtained from. |

|
Share Alike (SA) specifies that any derived works can only be shared under the same license restrictions and cannot be more restrictive than the original. |

|
Non-commercial (NC) limits the use of the image to non-commercial applications. In other words, you cannot sell a copy or derivative of the work or use it directly in commercial activities or operations. |

|
No Derivatives limits the use of the work as verbatim copies. No derivatives or remixes of the work can be shared publicly. |
Lastly, you may encounter one of two icons that indicate that the author of the work or image completely releases any and all rights to the image. These icons include the Creative Commons public domain mark and the Creative Commons zero public domain mark.
| Icon | Description |
|---|---|

|
The Creative Commons public domain mark indicates that the work was previously in or already fell into the public domain. |

|
Creative Commons zero public domain is the mark used by the author to relinquish as many rights as is legally possible to the work. |
Remember that in a previous Try It activity, you visited the website pixabay.com to locate and download a free image to use in your practice. These types of sites are called “stock media” sites, and you can download images, videos, animations, and more. It is, however, important that when you do locate and choose an image to use from one of these sites, you look for the license information. Pixabay.com posts this information below and to the left of the image, after you have clicked on the image to see the details. Furthermore, there is a hyperlink titled “Content License” that takes you to a page that explains what you can and cannot do with these images. Another stock media site called pexels.com does the same thing: The license level is posted below and to the left of the image preview, and clicking on it will show you the same do’s and don’ts.
Lastly, it is good practice to give credit to the original authors when possible. When you download an image from most stock media sites, it will show a message asking that you give thanks to the original author of the media by attributing the image (although attribution for free stock images is not required). In these cases, the site often gives you the ideal attribution, which you can copy. These attributions often include this statement:
EXAMPLE
Image by username from Pixabay
Copyright
Intellectual property right that protects original works of authorship as soon as the author fixes the work in a tangible form of expression.
Creative Commons
An American nonprofit organization and international network devoted to educational access and expanding the range of work available for others to build upon.
Attribution
Presenting credit to an author that created a piece of work.
Derivatives
Pieces of work that were designed starting from other existing pieces of work.
Public Domain
Creative material that is not protected by intellectual property laws, such as copyright, trademark, or patent laws.
Icons are simple images that can quickly convey meaning to a user. Humans tend to recognize visual cues faster than through text. Icons can be a valuable addition to a website as they can improve navigation and can be used to reduce screen clutter. Icons can convey the purpose or function of a button without, or in addition to, text. The result can be a cleaner, simplified interface with more room for content or imagery.
Don’t forget about accessibility! Icons are good at simplifying interfaces and improving user experience; however, images need to be made accessible. Thankfully, Font Awesome is a web service for using icons that are already designed to be accessible for screen reader technology. Ensure that if you use icons, you provide the HTML tag with a “title” attribute and the appropriate text value for what the icon does or represents. An alternative is to surround the visual element (the tag that is creating the icon) with some kind of surrounding tag that gives contextual information to the icon, such as surrounding the visual tag with a <button> tag with an appropriate title attribute.
The following code shows a sample <svg> element, which would represent the visual icon, surrounded by a <button> element. The <button> element has the title attribute describing the button’s function, and the type attribute is “submit.”
<button title="Send message" type="submit">
       <svg>...</svg>
</button>
Check out the accessibility documentation from Font Awesome.
EXAMPLE
The ribbon menu used in many Microsoft products, such as Microsoft Word, is an example of icons being used to improve user speed and efficiency. In the toolbar ribbon along the top, most, if not all, functions are visible as only a small icon. This makes it easier to not only find specific functions but also explore available functions and features. All of the same functions on the ribbon are also available in the dropdown menus along the top of the window. The drawback to the dropdown menu is that it uses words or phrases, and many of the features are hidden in submenus in order to save space. This can be slower and reduce the chances of someone finding a feature when they don’t already know its location.
The Font Awesome web service is a great source for icons. Developers can access thousands of icons and shapes. With a paid account, developers gain access to thousands of additional icons and can customize how the icons appear. Using Font Awesome is relatively simple and can add a more complete and professional feel to the design of any site. Font Awesome can be deployed and used within your site using multiple methods.
Method #1:
One method, as discussed in the following instructions, is to add a script tag that links to the service and then use the Font Awesome site to locate, customize, and get the HTML code to embed the icon. You then copy and paste the code into your HTML where you want the icon to appear. PRO: It is a simple process to set up as the developer. CON: It has longer loading times as the icons need to be downloaded from the Font Awesome service. Furthermore, since the Font Awesome system may or may not be under a heavy load, you cannot guarantee the fonts will always load within a reasonable amount of time.
Method #2:
The second method for deploying and using Font Awesome is to use the Font Awesome site to prepare a “kit” for your use. You download the kit and put it with your HTML files. This way, your pages will link to your local kit file and will not have to download the icons from a third party. PRO: It has better performance as you are not relying on a third-party service. CON: You have to use the Font Awesome site to prepare and download the kit file.
Adding Font Awesome icons to a site using Method #1 requires a few simple steps (however, it is always a good idea to read and follow the steps provided on the Font Awesome website):
 " crossorigin="anonymous"></script>, and it imports the script from Font Awesome libraries to your webpage.
EXAMPLE
<i class="fa-regular fa-user">
The <i> tag contains the “fa-regular” class, which specifies creating an icon as a hollow outline, as well as the “fa-user” class, which specifies the specific icon to create.
Icons
Simple images that can quickly convey meaning to a user.
Font Awesome
A popular online library and icon toolkit for including web-safe and accessible icons.
Source: This Tutorial has been adapted from "The Missing Link: An Introduction to Web Development and Programming " by Michael Mendez. Access for free at https://open.umn.edu/opentextbooks/textbooks/the-missing-link-an-introduction-to-web-development-and-programming. License: Creative Commons attribution: CC BY-NC-SA