Table of Contents |
As mentioned earlier, tables are one tool for structuring content and are effective at displaying tabular data. A table begins with the <table> element as the parent container for the entire table. The next element within the table is the <tr> table row element. Each set of <tr> tags represents one row in the table. Next, within each row are the <th> or <td> elements, which effectively represent one cell in a row. <th> is used to create table header cells, wherein the text content within the cell will be bold and centered. <td> is used to create table data cells within a row; there is no special formatting applied to <td> cell content by default.
As you may have noticed, there are no “column” tags. This is because columns within an HTML table are implied by matching up the number of cells within each row. If you need a table that is three cells high by three cells wide, you would have three sets of <td> tags, and within each <td> element, you will need three sets of <td> tags for a total of nine.
EXAMPLE
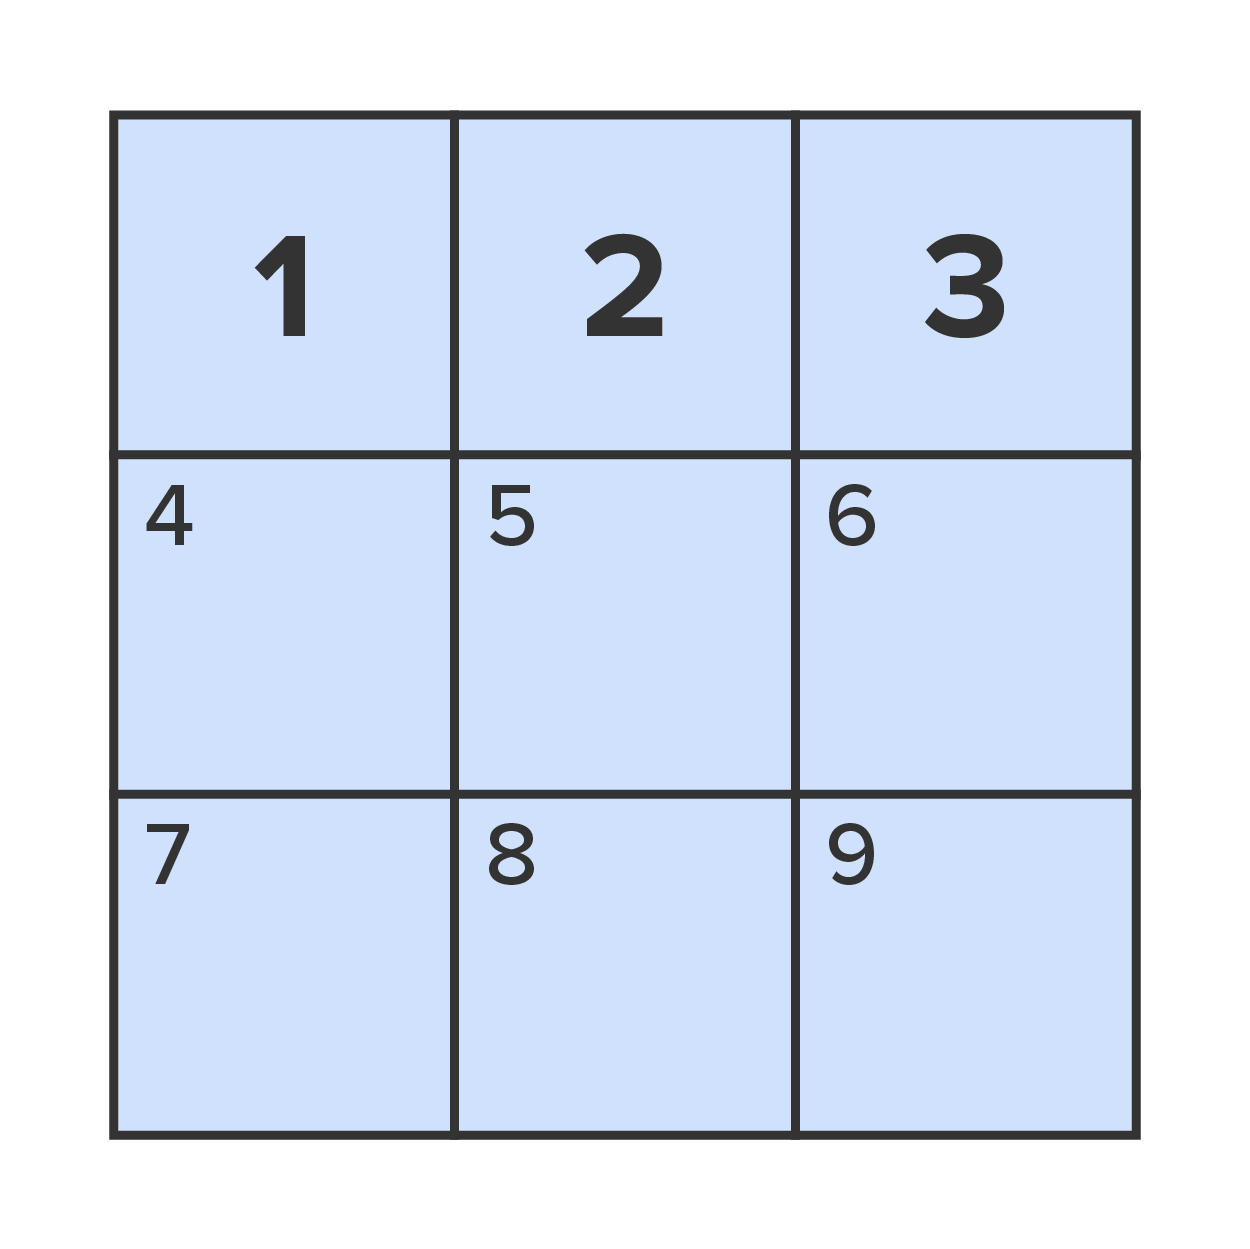
<table>
      <tr>
            <th>1</th>
            <th>2</th>
            <th>3</th>
      </tr>
      <tr>
            <td>4</td>
            <td>5</td>
            <td>6</td>
      </tr>
      <tr>
            <td>7</td>
            <td>8</td>
            <td>9</td>
      </tr>
</table>
This will render as follows:

Tables can also be structured with three additional semantic tags designed specifically for HTML tables. These are <thead>, <tbody>, and <tfoot>. While these additional table semantic tags do not apply any special formatting to the contents, they do provide more meaning to screen reader technology, as well as allow the ability to scroll the table of data independently of the <thead> and <tfoot> sections. To use these semantic tags, you will encapsulate the rows intended for the tags with the semantic tag.
EXAMPLE
<table>
      <thead>
            <tr>
                  <th>1</th>
                  <th>2</th>
                  <th>3</th>
            </tr>
      </thead>
      <tbody>
            <tr>
                  <td>4</td>
                  <td>5</td>
                  <td>6</td>
            </tr>
      </tbody>
      <tfoot>
            <tr>
                  <td>7</td>
                  <td>8</td>
                  <td>9</td>
            </tr>
      </tfoot>
</table>
This will render as follows:
As you can see, the thead, tbody, and tfoot do not have any visual effect on the table, but they instead provide programmatic meaning for assistive technology utilized by impaired individuals.
EXAMPLE
<table>
      <thead>
            <tr>
                  <th>1</th>
                  <td>2</td>
                  <td>3</td>
            </tr>
      </thead>
      <tbody>
            <tr>
                  <th>4</th>
                  <td>5</td>
                  <td>6</td>
            </tr>
      </tbody>
      <tfoot>
            <tr>
                  <th>7</th>
                  <td>8</td>
                  <td>9</td>
            </tr>
      </tfoot>
</table>
This will render as follows:
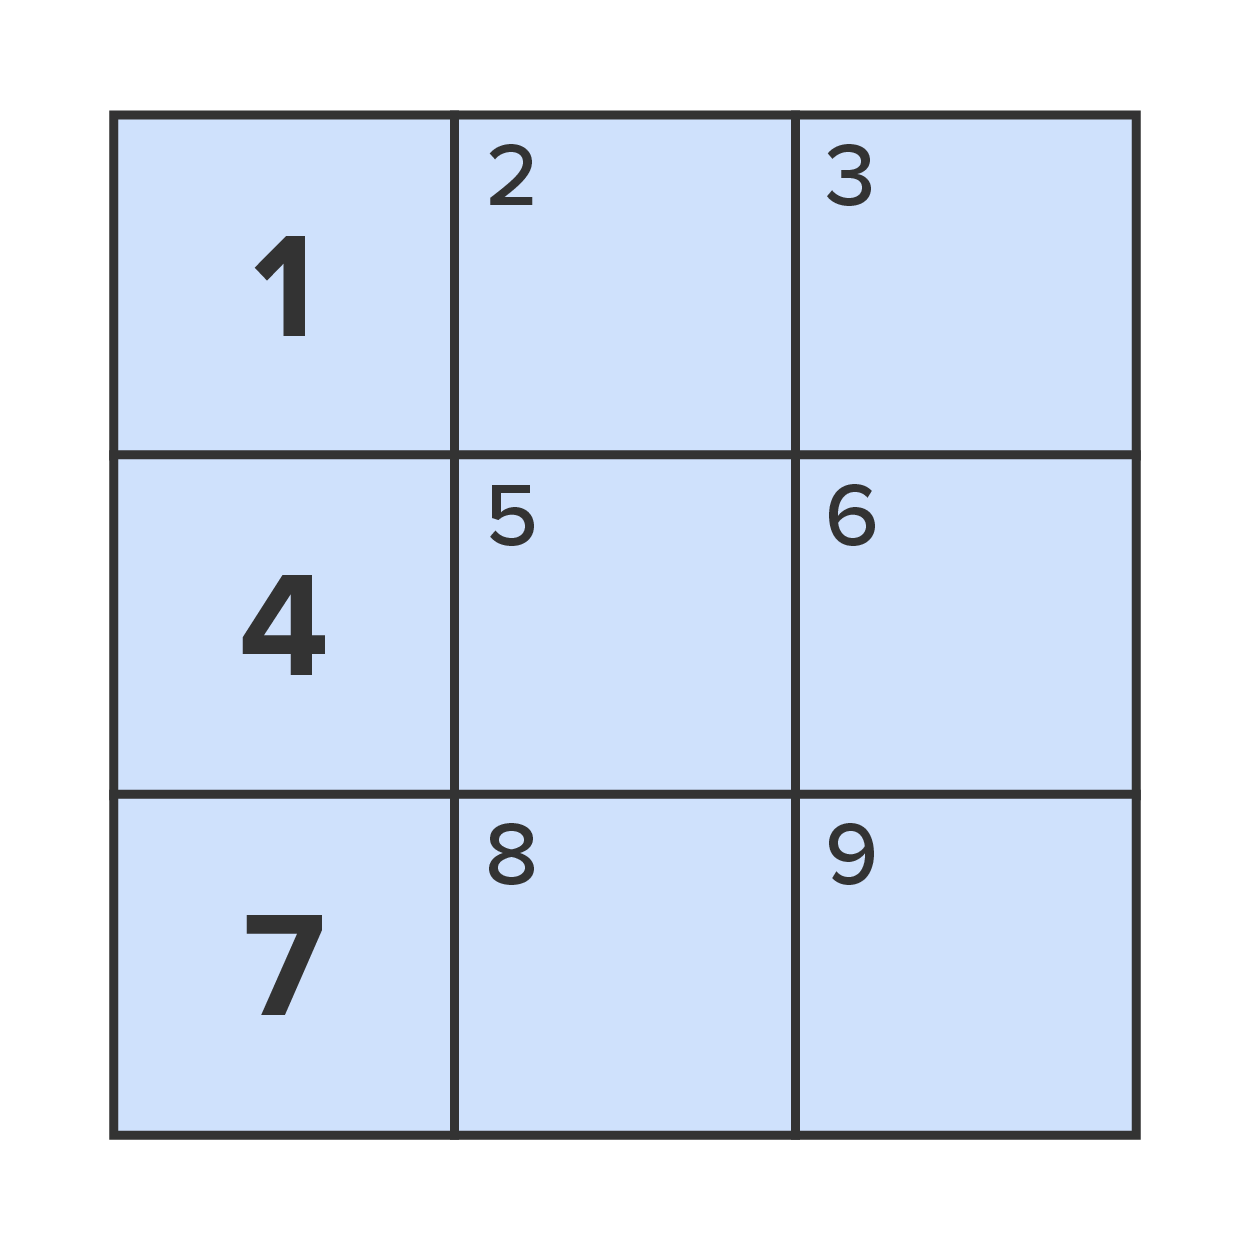
Table Row Tag <tr>
An HTML tag used to define an individual row of an HTML table.
Table Header Tag <th>
An HTML tag used to define an individual header cell, with its content formatted as bold and center aligned.
Table Data Tag <td>
An HTML tag used to define an individual cell within a row of an HTML table.
Table Head Tag <thead>
An HTML semantic tag used to surround and identify certain rows in the table as the table’s header.
Table Body Tag <tbody>
An HTML semantic tag used to surround and identify certain rows in the table as the table’s body.
Table Foot Tag <tfoot>
An HTML semantic tag used to surround and identify certain rows in the table as the table’s footer.
Table cells can also be merged with others, which is referred to as column or row spanning. This is done by adding either the “rowspan” or “colspan” attributes to the opening cell tag (<td> or <th>) and setting it equal to the number of rows or columns you want the cell to span across, including its original row or column.
EXAMPLE
Note that the numbers show the original cell that was spanned.
<table>
      <tr>
            <th colspan="3">1</th>
      </tr>
      <tr>
            <td rowspan="2">4</td>
            <td>5</td>
            <td>6</td>
      </tr>
      <tr>
            <td>8</td>
            <td>9</td>
      </tr>
</table>
This will render as follows:
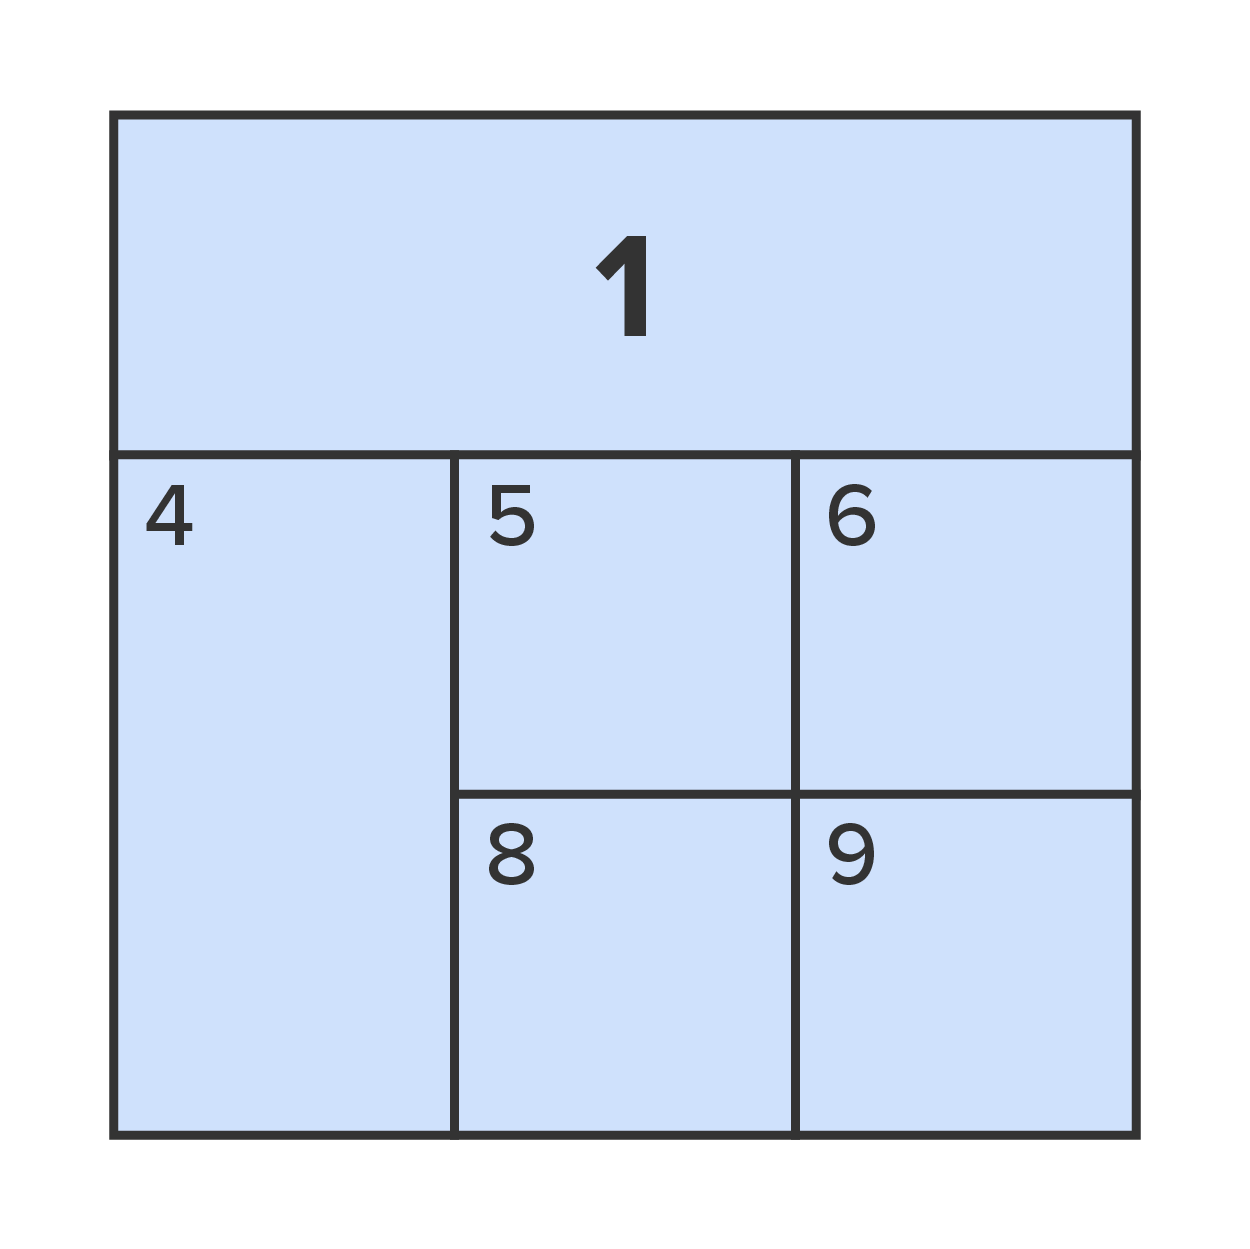
Remember that you can only use colspan to span a cell to the right x number of columns and rowspan to span a cell down x number of rows. When you want to span cells, make sure you start with the cell that is either in the highest row or the left-most column of the rows or columns you want to span across.
Now that you have seen how to create HTML tables, it’s time to practice! We will create a three-column, five-row table to hold the hours of operations. The first row will be a header for the table, the second will be the headers for the columns, and the remaining three rows will be the data.
Mon-Friday, 8am to 8pm.
Sat, 8am to 2pm.
Sun, closed.
Directions:
1. Return to your Repl and, in the index.html file, position your insertion point between the main sections and add a table element. In the table’s opening tag, give it an id attribute with a value of “hours.”
2. Next, add five rows to the table using the <tr> elements.
This is the Replit expected output:
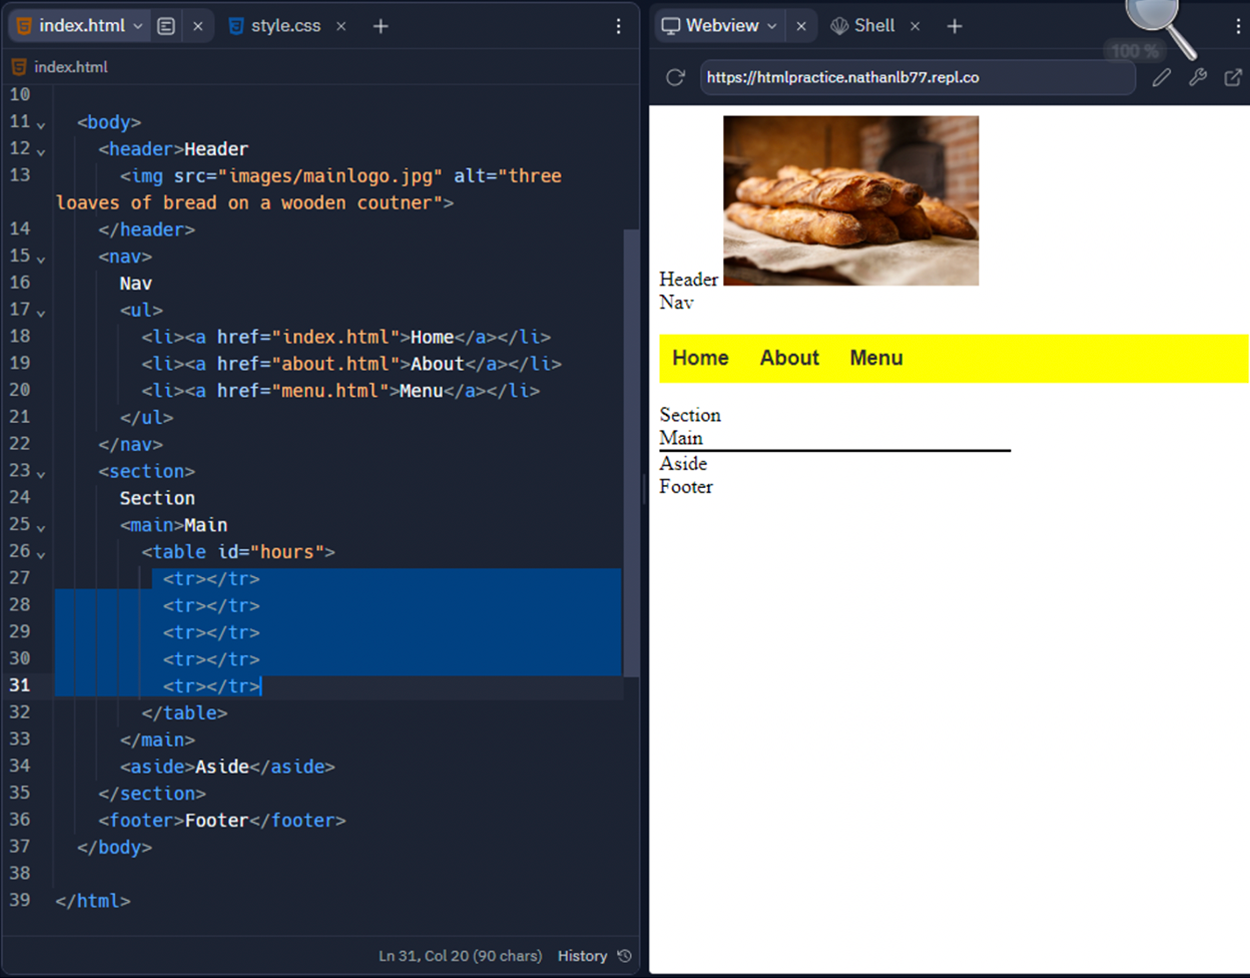
NOTE: Table cells, by default, only take up as much space as needed per its content. At this time, there is no content in the cells, so the only thing you can see is the empty collapsed outline of the table between the “Main” and “Aside” words.
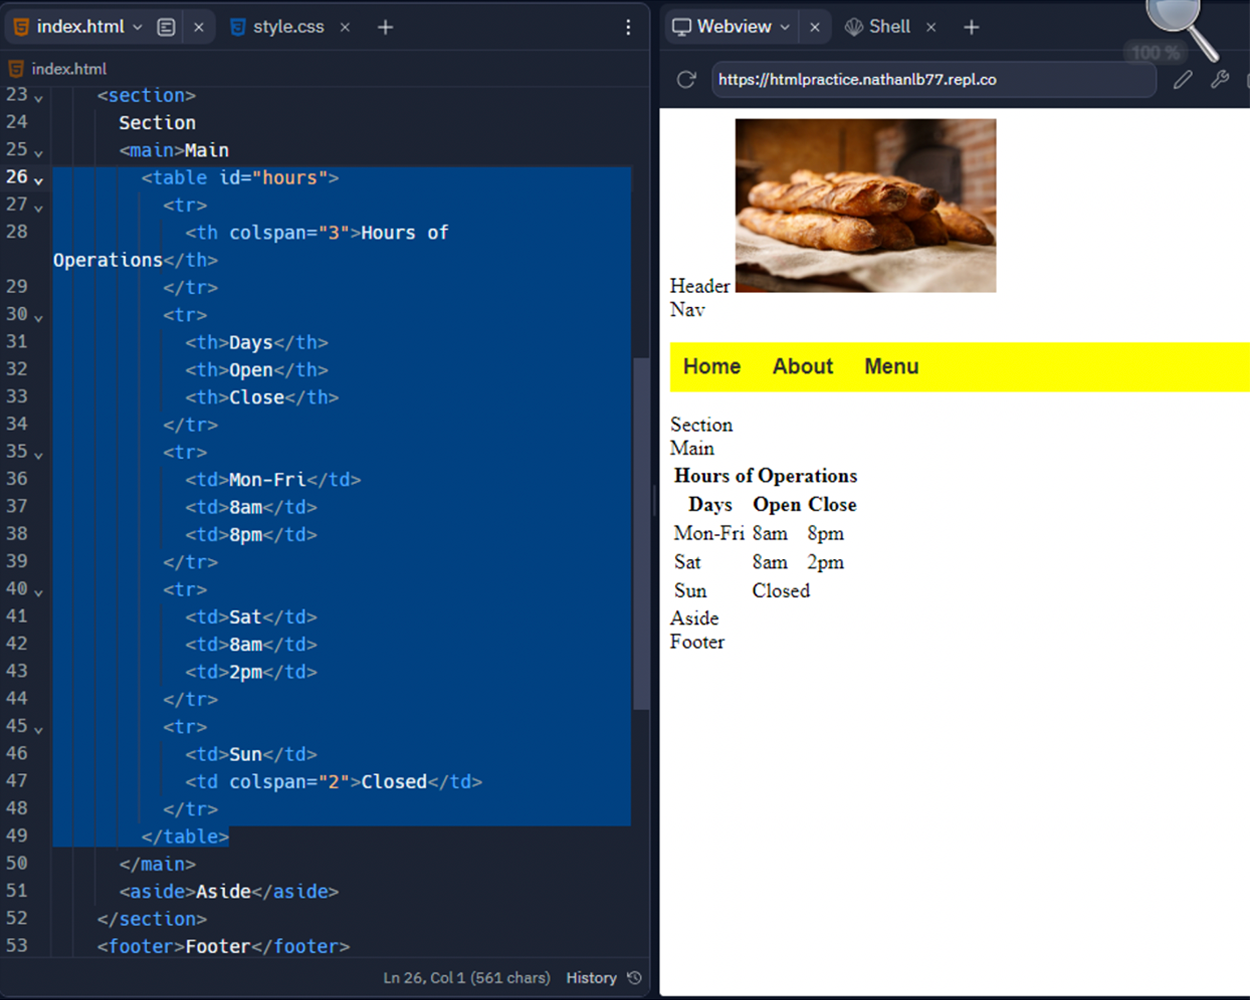
3. In the first row, add a single table header cell using the <th> element. Give it a “colspan” attribute of 3 and write the text “Hours of Operations” between the opening and closing <th> tags. This will serve as the table’s title.
4. In the second, add three table header cells <th>. Type the text “Days,” “Open,” and “Close” in each of the three header cells.
5. In the third and fourth rows, add three table data cells <td> to each row.
This is the Replit expected output:
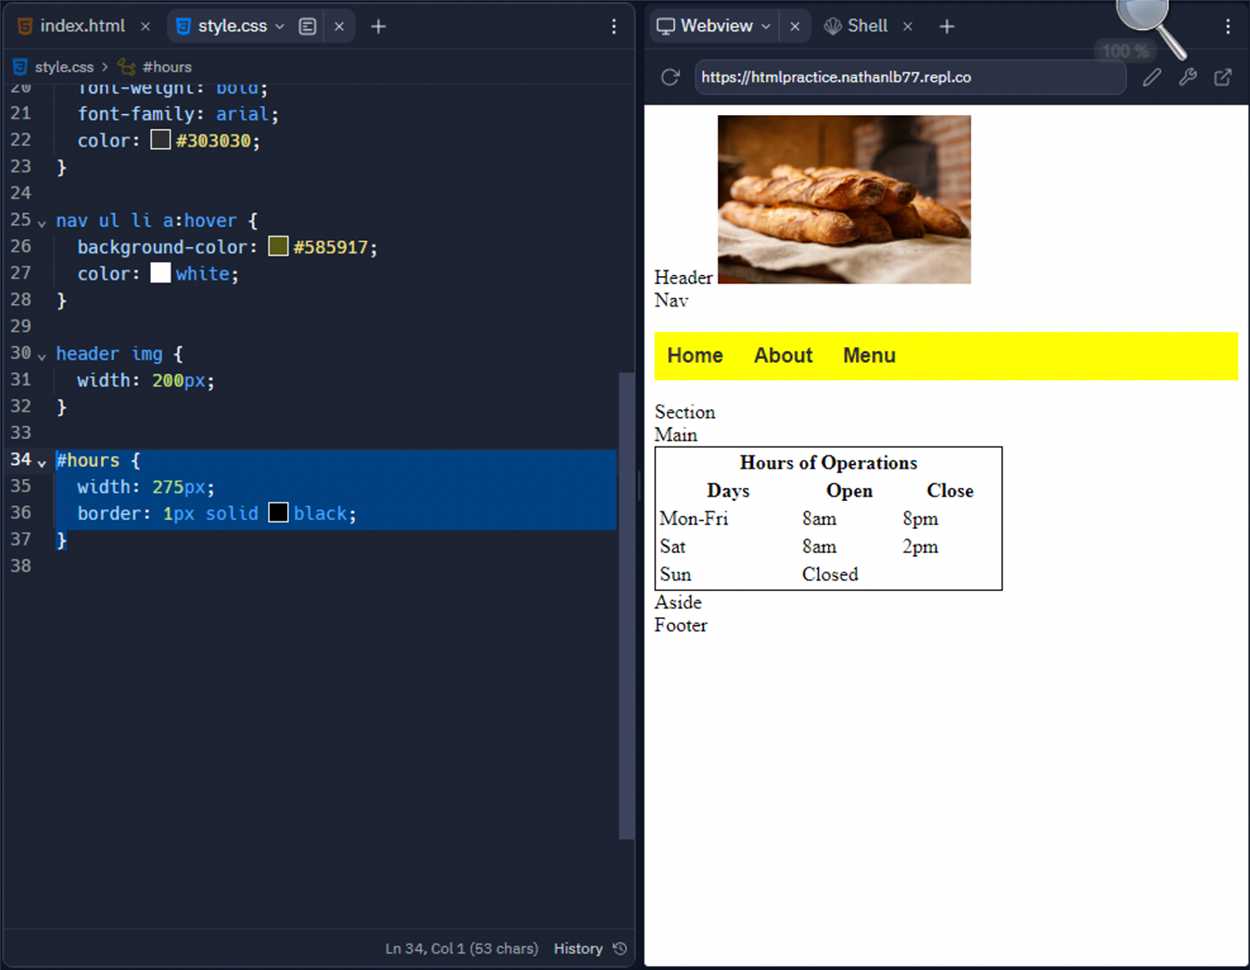
7. Now that we have the HTML structure in place, let’s add a few basic style properties to improve its appearance. Open the stylesheet file (style.css), and create a new style rule that uses the “hours” id selector. Assign the width to be 275 pixels. Give the table a border of 1 pixel wide, solid, and #000000 (black). This will widen the table to 275 pixels and will add a solid 1-pixel-wide border around the entire table.
This is the Replit expected output:
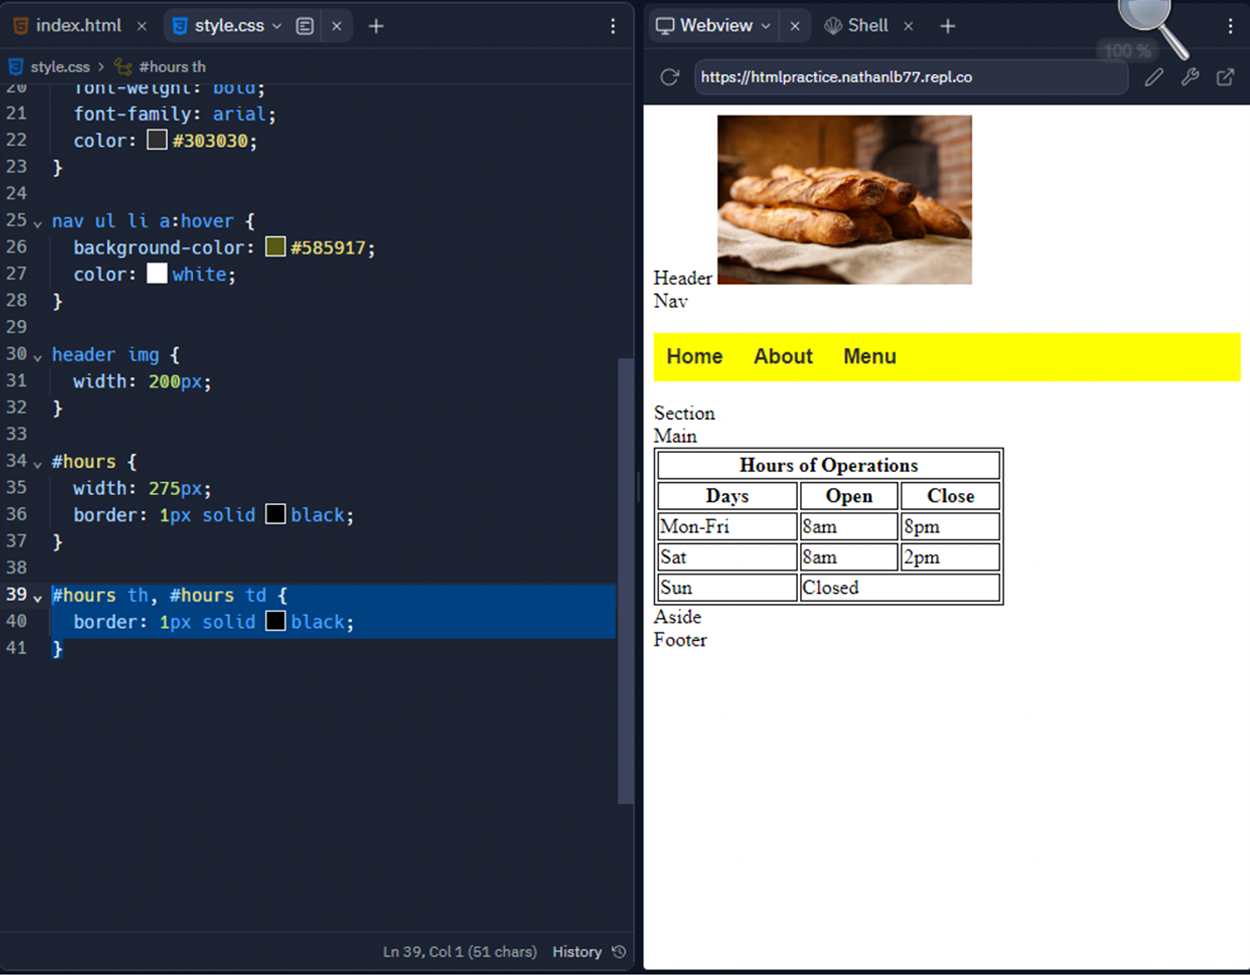
8. Next, add a new style rule that uses the following selectors in a comma-separated list:
#hours td, #hours th
Then, give it the same border properties as the table itself. This should add a set of borders around each cell.
This is the Replit expected output:
Tables are very useful for displaying data in a way that adds meaning and clarity to the data. In this case, a nice little hours of operations table lets the audience know when the physical store will be open and when it will close, and on what days. We were able to convey the meaning of the table data overall using the spanned first row header cell; then, we added meaning to the columns of data using the second row of header cells.
Table headers and spanned cells can add a multitude of meanings and organization to the information needed by the site’s audience. Furthermore, using <thead>, <tbody>, and <tfoot> can add programmatic meaning to assistive technology as well as SEO spider bots.
View the following video for more on using tables to display data on a page.
Rowspan
An HTML attribute for <td> and <th> tags that merges the cell down across multiple rows of the table.
Colspan
An HTML attribute for <td> and <th> tags that merges the cell to the right across multiple columns of the table.
Source: This Tutorial has been adapted from "The Missing Link: An Introduction to Web Development and Programming " by Michael Mendez. Access for free at https://open.umn.edu/opentextbooks/textbooks/the-missing-link-an-introduction-to-web-development-and-programming. License: Creative Commons attribution: CC BY-NC-SA