Table of Contents |
Replit.com changes its interface frequently. For the most current instructions and a robust help guide visit docs.replit.com.
Note that the following images are screenshots of Replit in dark mode. In dark mode, the background uses dark colors and the text and buttons are light. Dark mode is a preference of most software developers as it reduces eye strain and fatigue. Most modern Integrated Development Environment (IDEs) and code editors have some form of dark mode that all new developers are encouraged to utilize. To change the mode in Replit.com, make sure you are logged into your account. Then, in the lower left corner of the site, you should see a download that says either “light” or “dark”, click the dropdown menu and select the mode you want.
There are different ways to write your code and run it when creating the program. For many languages, there is the option to use an Integrated Development Environment (IDE) to write the code. Reflect back to a previous lesson where you learned that an IDE is an application that provides a variety of tools and features that make software developers more efficient and accurate. IDEs work similarly to a basic text editor, but include additional features that aid in the coding and development process.
Individuals and organizations may have different preferences of which IDE they like to use. This course uses a web-based IDE called Replit.com. In this lesson, we will cover the basic features that you will find in almost any IDE. Then, we will look at the benefits of web-based IDEs along with replit.com’s unique features.
Replit.com will be the required tool for completing this course. At the end of this lesson you will need to visit replit.com and create an account and start getting familiar with the interface and layout as we cover the basic and advanced features.
Step 1: To get started, access the Replit sign-up site.
Step 2: Follow the prompts to create a Replit user account:
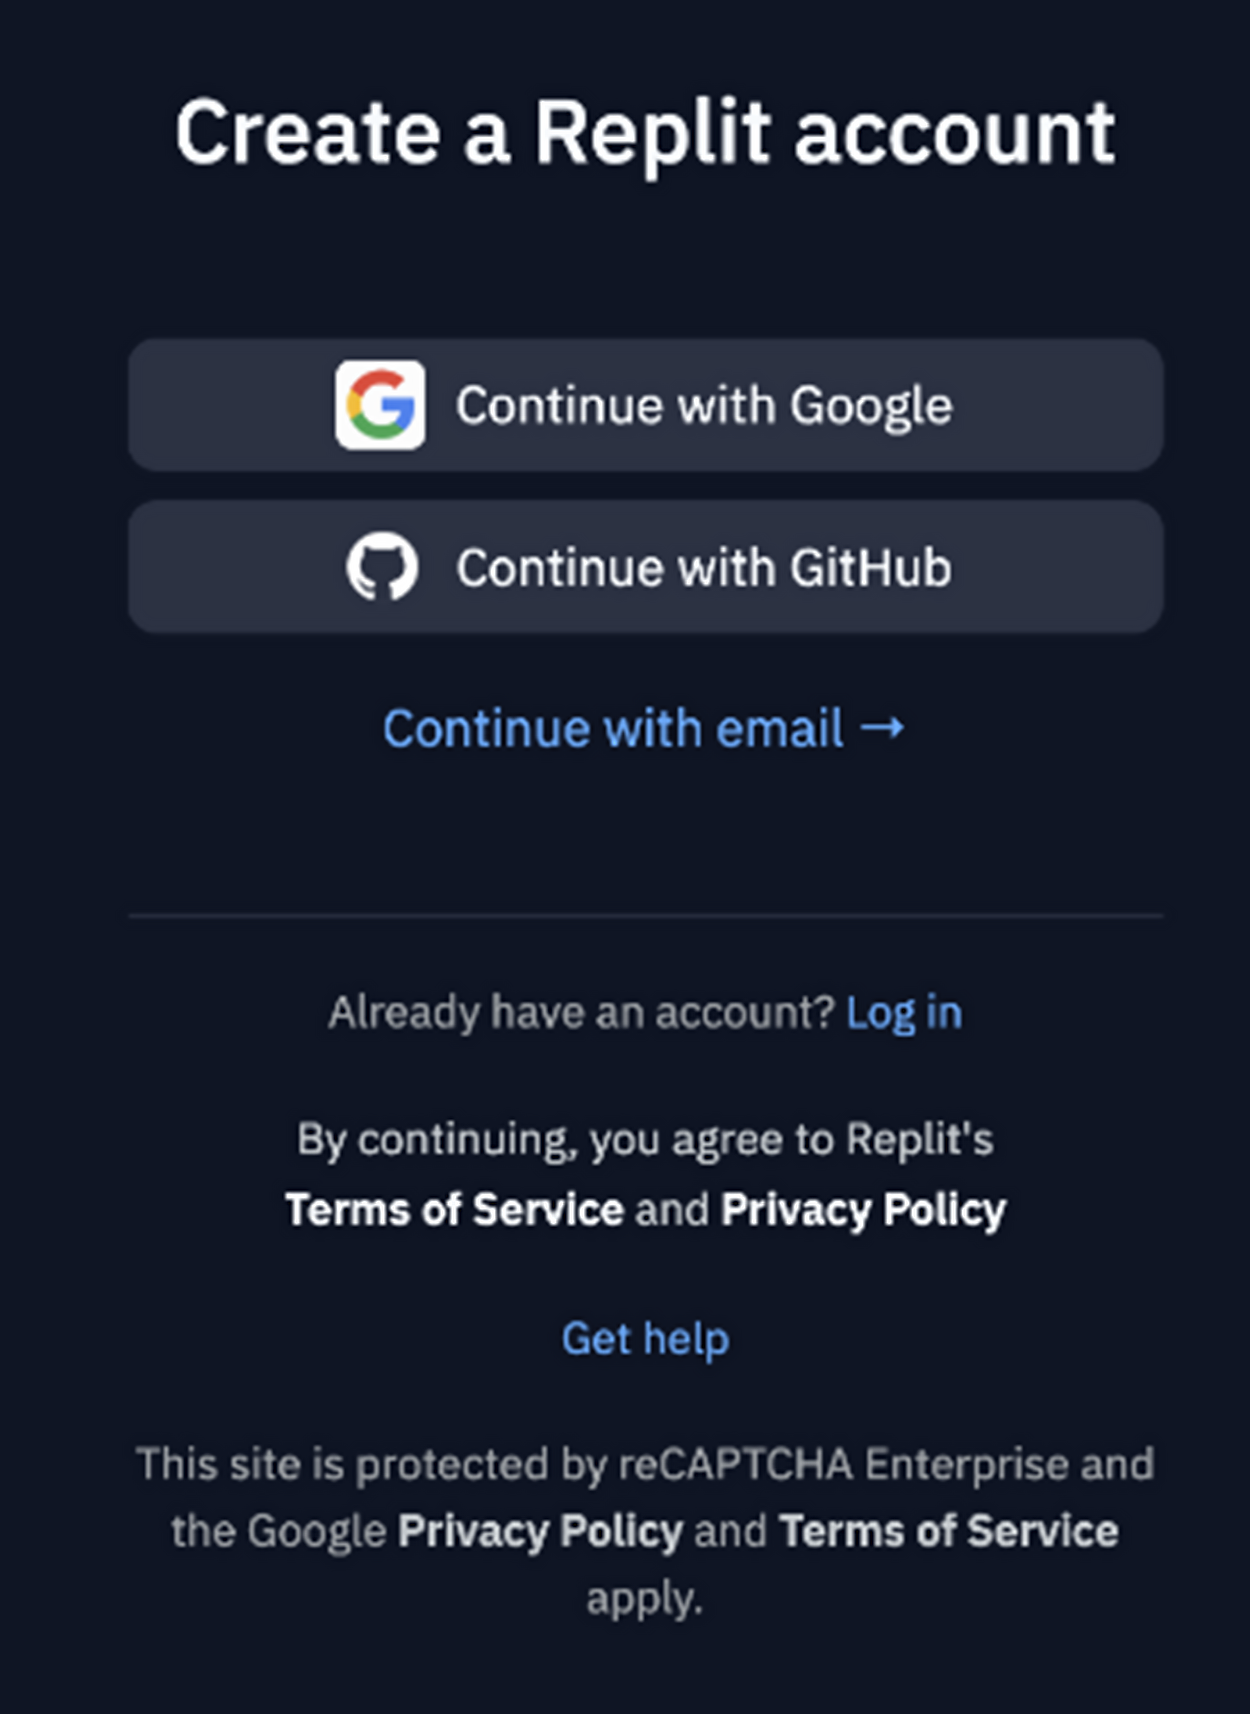
If you already have a Google or GitHub account, you can use them to create your Replit account by selecting “Continue with...”. Otherwise, select “Continue with email” to create a new Replit account.
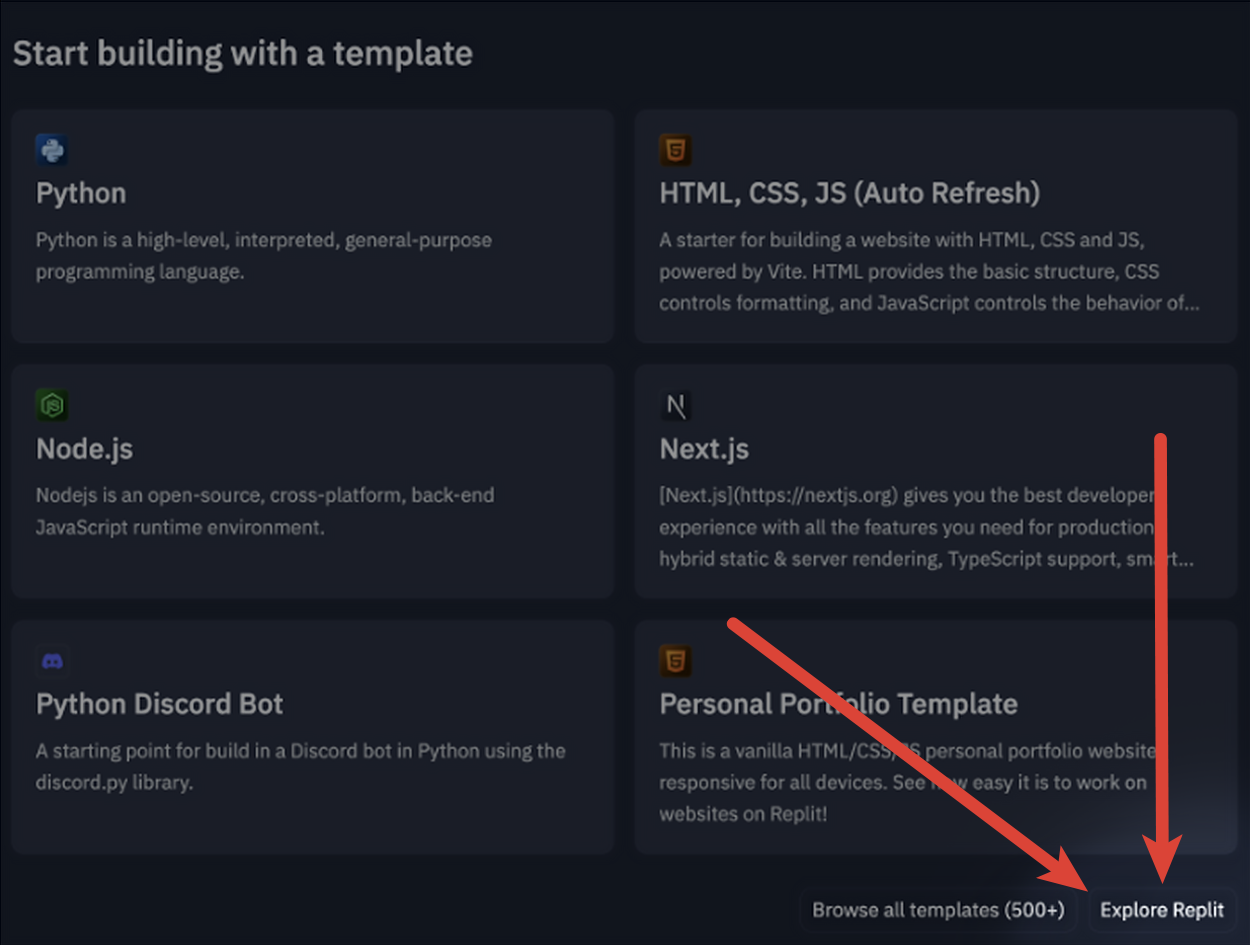
Step 3: Once the account is created, click the “Explore Replit” button to skip past the template creation options.
Once you have created your account and logged in, you will see your account home page which includes a list of your recent projects, currently open bounties, and featured public Repl projects created by other users. You will also have a navigation menu on the left which can take you to the template page, your saved projects, community resources, and more. This homepage and the connection to the community is the first difference from a text editor or even a locally installed IDE like Microsoft’s Visual Studio. You can see other’s work, stay connected, and learn more through the online resources made available to you through replit.com.
Now that you know more about Replit, it’s time to create your account.
Directions:
You are prepared to begin exploring Replit. Recall that a helpful guide is available at docs.replit.com if you have questions about the Replit interface along the way.
Repl
A term used by replit.com to refer to an actual project.
Now that you have an account, let’s explore some of the features of Replit. We’ll start by creating a new Repl.
Now that you know more about Replit, it’s time to create your account.
Directions:
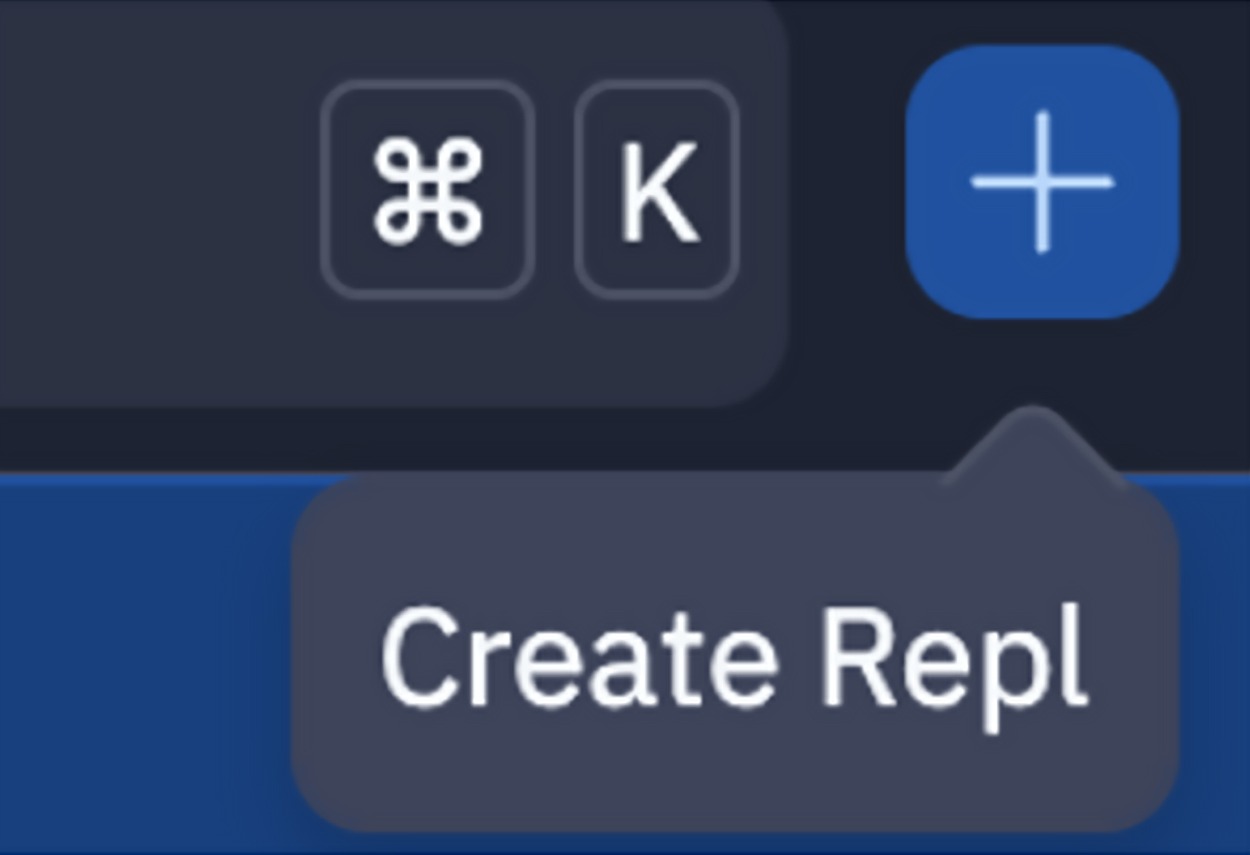
1. Click on the “+” Create Repl button in the top right. This will allow the creation of a new project.
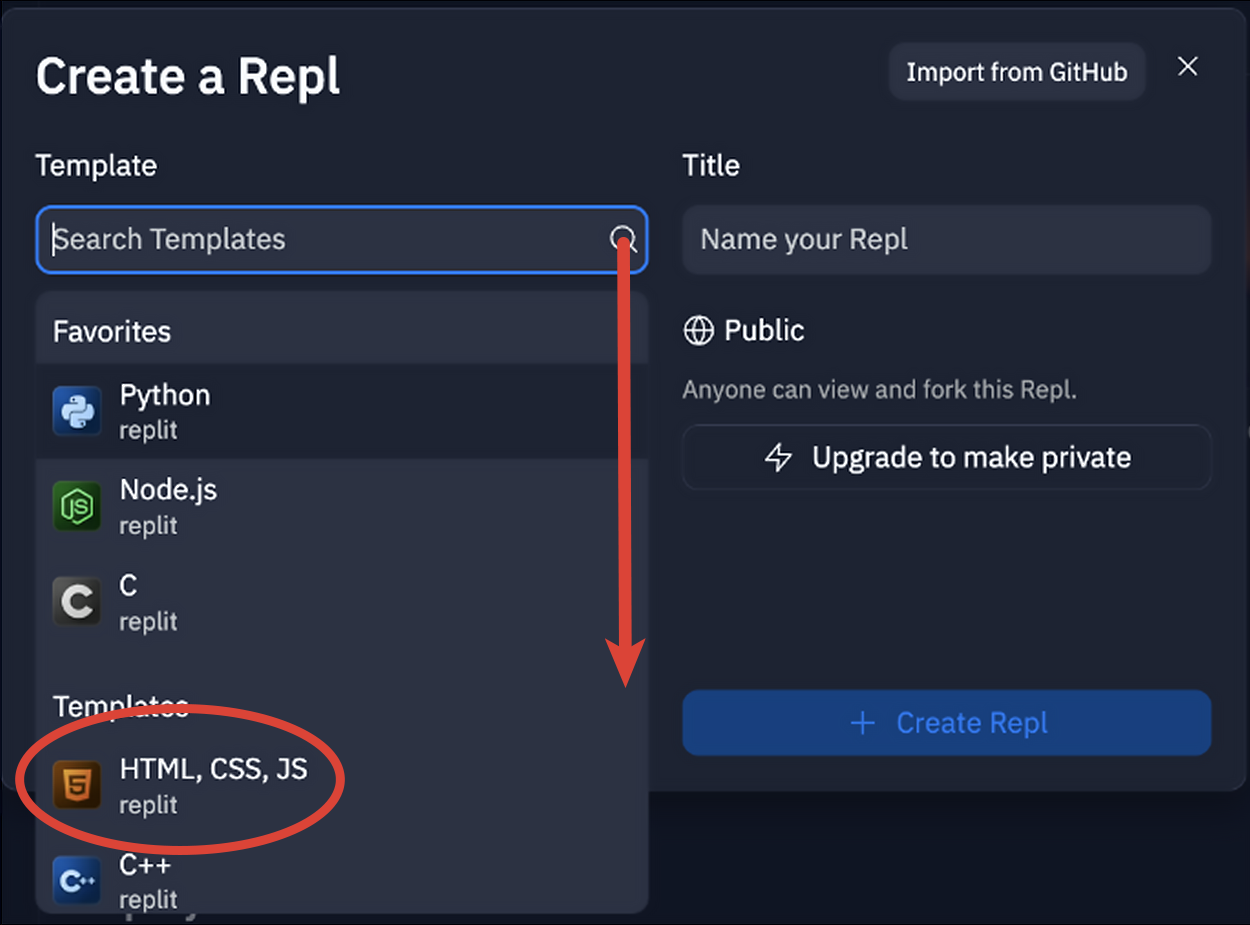
2. The Create a Repl window appears. Select “HTML, CSS, JS” from the Template dropdown menu of languages. If Replit has been used previously, the language you used may appear at the top under Favorites.
Repl templates provide sample files that can be edited or used for new projects. They can provide a great starting point when learning a new computer science skill.
The HTML, CSS, JS template provides a starting point for creating a web project.
3. By default, a random project name will be generated in the Title field. Please change the default name to something more meaningful to your project.
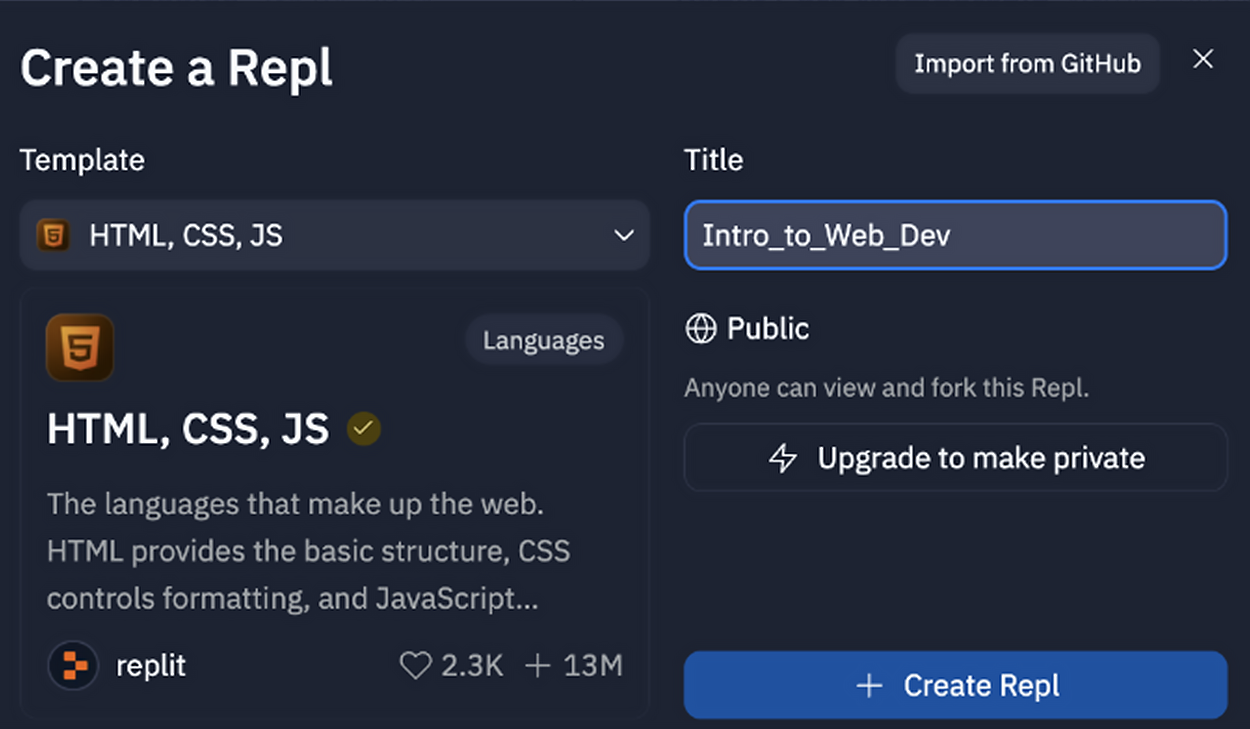
It’s important to note that by default, the Repl will be public. This means that this project can be accessible by anyone on the Internet. Although this can be very useful when it comes to collaboration and sharing of code, care should be taken when using personally identifiable information in your projects. This includes adding passwords to your project code.
4. Finally, select + Create Repl to create the project. This will fork the template so you can create your own repl and take you to its IDE page.
Now that you have your first Repl created we can examine the Replit interface where you will work on your project. Let’s take a look at the different basic components contained in any modern IDE.
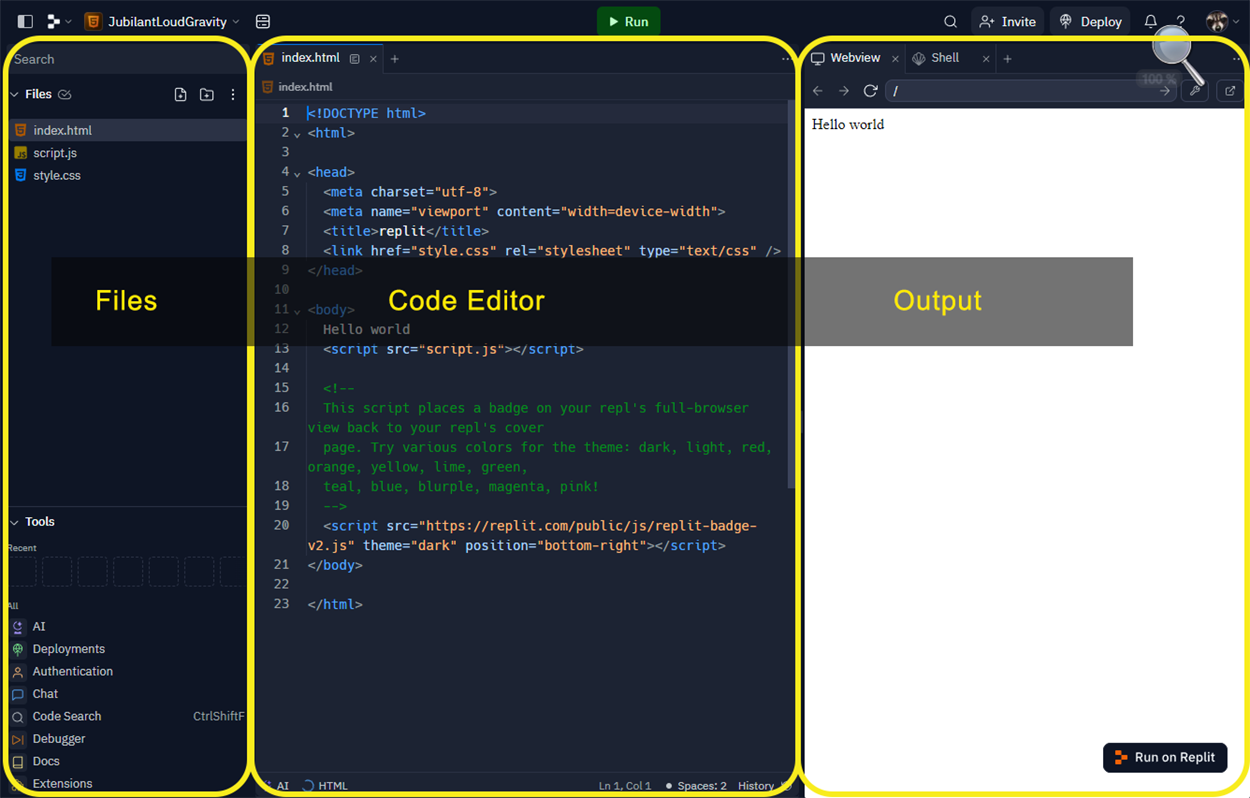
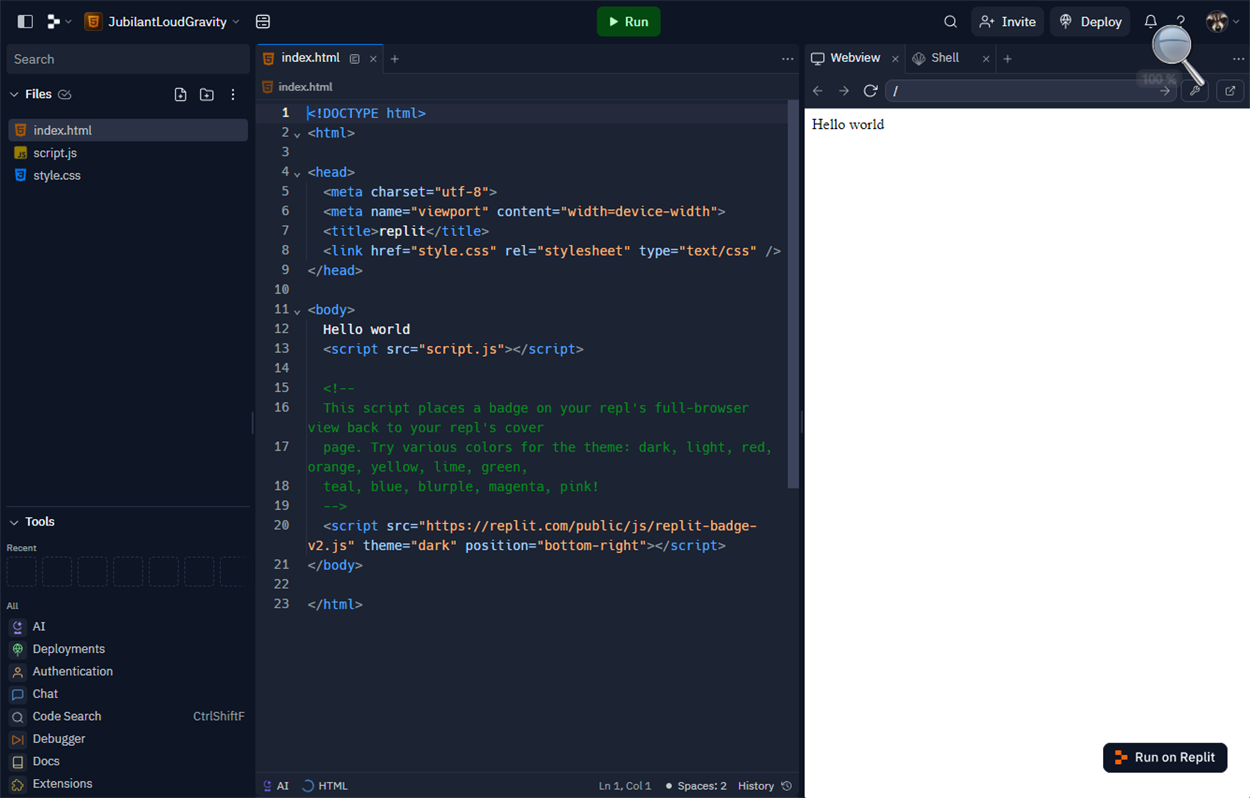
The main Replit interface consists of three sections that display project files, a code editor and the program output.
EXAMPLE
Next, we will examine each of these sections in more detail.
The first section you might recognize is the code editor in the middle. This is the large pane with colorized text. This is the main code editor pane and where you will do most, if not all, of your coding. Code editors have the same features of a basic text editor as well as additional features such as auto code completion, code suggestions, multi-cursor, and advanced find and replace tools. Additionally, much like the spelling and grammar error tools in Microsoft Word, IDE code editors will examine your code and identify syntax and logic errors using red underline. Hovering your mouse over one will open a pop-up containing a description of the problem and in good IDEs may include a suggestion as to how to fix the issue.
Some IDEs also allow you to have multiple code files open at once. You can have multiple files open in tabs and easily swap back and forth between the tabs, or you can tear a tag off its pane and drop it to open a new pane. This is a helpful feature when working in web development as we often have code that interacts directly with each other but are abstracted out into their own files, as is often done with HTML, CSS, and JavaScript.
EXAMPLE
The files pane on the left is the list of files currently located in your project directory. Any files located in this section are included in the project and can be used or accessed directly. Here you can create new files, delete or rename files, and create sub directories or folders to organize the files. As this is an online web-based IDE and the file directory exists on the replit.com server, if you need to get a file from your local computer into the project, you can use the three dots menu and upload a file or entire folder to the project. You can also hide files as well as download the entire project directory to your local computer.
The output pane is the pane that shows you the results of your code. IDE output typically comes in two forms, HTML content rendered to a page or textual content posted to the console. The output does not update automatically after you make changes to the code, you have to click on the green Run button at the top of the IDE interface. This will re-run the code and update the content in the output. To view the content posted to the console, you will need to run the Repl and then open your browser’s developer tools (F12 for Google Chrome) and view the console tab.
Console
A text-based tool used for interacting with software and is often where technical information and data is reported for developers to see.
In addition to the main interface components, some of the basic functions of an IDE include:
| Function | Description |
|---|---|
| IntelliSense | IntelliSense is a feature of modern IDEs wherein the IDE will continuously examine your code to identify problems. The IDE does this not just for the code file being worked on, but does this for the entire project. Basically, the IDE is pre-rendering and pre-executing your project in the background while you work. Not only does this allow it to easily identify syntax errors, but it allows it to identify logic errors and access violations almost in real-time. |
| Error messages | Error reporting is a key feature of an IDE used for software development. When the IDE detects an error through IntelliSense or when attempting to execute the code, the IDE will produce an error message and place it in the error log. The error log includes an error code, written error message, and details about where, when, and sometimes why the error occurred. No programmer is perfect and having the IDE constantly looking over your shoulder is a great advantage. |
| Code Suggestion / Auto Completion | Another benefit of IntelliSense is that it allows the IDE to predict what your next step will likely be and will provide a suggestion of how to complete the code. This can be anything from completing a single word, to building out a complete code structure based on what you did previously. |
| Running the code | IDEs are typically equipped to execute or run the code project. This includes having the necessary libraries and applications to compile the code and show its results. Many times an IDE will provide additional helpful insight and metrics into the program’s performance when executing the code. |
| Debugging the code | An IDE should provide the tools needed to debug the code. Generally, debugging is the process of carefully examining the code and how it executes to identify and resolve problems or errors with the code. When debugging, the IDE executes the application, but keeps the execution closely tied to the actual code files and IDE. This way, while the program is running, you can examine the contents of the program’s data in RAM, step through the program one line of code at a time, some IDEs even allow you to manually manipulate data in RAM to see the results. |
In addition to lots of other smaller features, IDEs provide a wide range of tools and utilities for making developers more efficient and more effective. However, the realm of web development encompasses a wide range of technologies that have to work together seamlessly. As such, replit.com provides a set of advanced tools that enable developers to be even more effective at prototyping, testing, and deploying web software.
Replit.com provides developers with a robust set of tools that go beyond the basic features of an IDE. Replit.com integrates package management, authentication tools, deployment options, extensions, git integration, database tools and databases, and even thread management. If you are developing an application that will use a database, you can easily set up a free postgreSQL database, use the proprietary NoSQL Replit database, or connect to an external one.
Thread
A stream of instructions being executed by a single processor core.
PostgreSQL
A free and open-source relational database management system.
You will create a need to have a Replit account to work on Touchstone Task 2.1: Creating HTML Pages. Now is a great time to create your account. Don't forget to add Replit to your developer toolbox!
Source: This Tutorial has been adapted from "The Missing Link: An Introduction to Web Development and Programming " by Michael Mendez. Access for free at https://open.umn.edu/opentextbooks/textbooks/the-missing-link-an-introduction-to-web-development-and-programming. License: Creative Commons attribution: CC BY-NC-SA.