Table of Contents |
When it comes to programming, there are different ways to write your code and run it. For many languages, you have the option to use an Integrated Development Environment (IDE) to write your code. An IDE can be viewed as a text editor that has additional functionality to allow developers to perform some additional tasks to simplify the workflow of the development process. Different individuals and organizations have their preferences of what IDE they prefer.
Throughout this course, we’ll be using Online GDB for Python. It has some unique features in that it’s a tool that is completely run through a browser. This means you can use it from any computer, tablet, or mobile device to write, build, and run your code.
Within Online GDB, you can deploy any of the code that you create externally with just a click. There’s no need to copy code or make changes to the underlying environment. In addition, Online GDB can fully manage your environment that you use to build and run your code. This means that you don’t have to worry about having the right version of Python or the right library, which is prewritten code collections that you can use.
Integrated Development Environment (IDE)
A text editor that has additional functionality to allow developers to perform some additional tasks to simplify the workflow of the development process.
Libraries/Library
Prewritten code collections that you can use when developing a program.
Even though you don’t need an account to use Online GBD, you should still create one. By doing so, you will be able to use all the features that are required for this course (saving and sharing you projects).
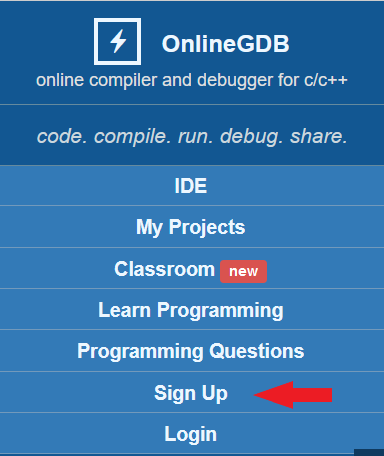
1. To get started, access the following site: www.onlinegdb.com/
2. Click “Sign Up” and create a GDB user account. You will need to verify your account before all account features will function.
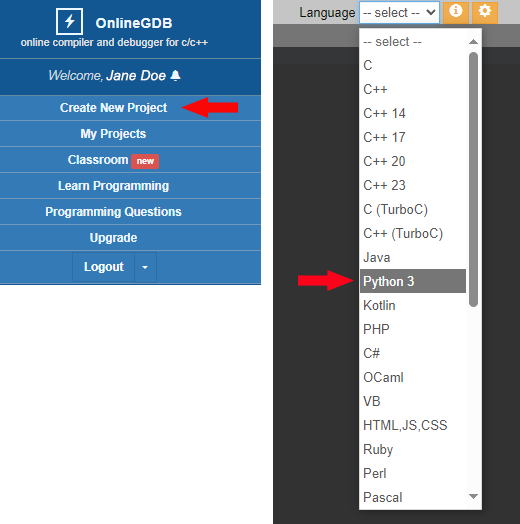
3. To create a new project select the "Create New Project" button, then select the correct programming language by choosing "Python 3" from the dropdown menu in the top right corner. If you forget this step, it will alert you that you must choose a language.
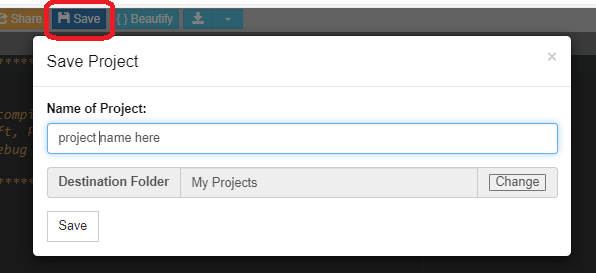
4. To save your project, if you plan to come back and work on particular program, click the Save button. Once you provide a name and hit the save button it will appear in My Projects tab.
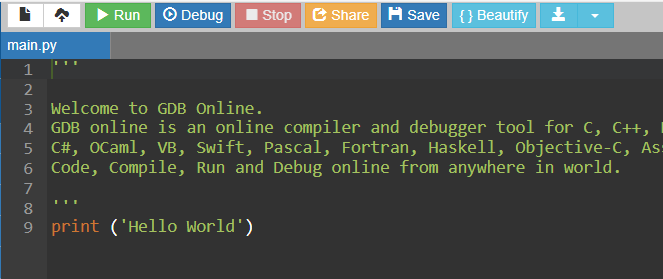
Across the top of the IDE, there are 9 buttons to become familiar with.
Let's look at the details of these buttons:
| Button | Description |
|---|---|
| New File | Creates new files. Later in the course we will need multiple files, and this button will be used at that time. |
| Upload File | Allows uploading of files, which we will not use in this course. |
| Run | The most important button executes the code you put in the text editor. |
| Debug | Allows you to create breakpoints (stops) and step through the code during execution. |
| Stop | Terminates code that is not functioning properly or running continuously. |
| Share | Generates a URL that can be shared with others to see your code. This will be used in the end of course to share your touchstone project. |
| Save | Saves your code to your My Projects tab. If you haven't yet saved you will be prompted for a Project name. |
| Beautify | This feature can be useful as it allows the spacing and indentation of your code to modified to make code more readable. |
| Download | This feature allows you to save a copy of your code on your own computer. It is not required for this course but is helpful if you plan to keep your own backup of any projects. |
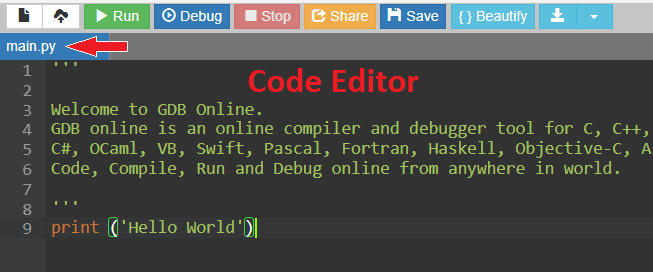
By default, the main pane displays the code editor. You will spend the majority of your time working in the code editor window. Python code is written and edited in this tab. A main.py file is listed directly above the code editor and displayed in the code editor tab by default as shown by the red arrow. The main.py file is automatically created for you when you create a new project.
The pane initially on the bottom of the workspace is the Input/Output Console (or just console). This is the section where when the code is run the output is presented.

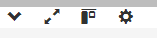
Notice the buttons at the top of the Input/Output Console. Let's discuss what each does.
| Button | Description |
|---|---|
| Hide | This will hide the Input/Output Console. You will be using this console all the time in this course so there is no reason to hide it. |
| Maximize | Opens the console to the maximum side possible. |
| Vertical Position | Switching the console position from the bottom to the right-hand side of the code editor pane. |
| Terminal Settings | Allows switching from dark/light mode and adjusting font size and font weight. |
You have likely noticed the ads that display on the right-side and bottom console areas. From now on we are switching to the vertical position for the Input/Output Console. This closes the bottom area and limits the ads since the right-hand side is now the console (see image below).

Note: If you want the left side menu to be visible, select the box with the lightning bolt. That will reopen the left menu.
Also note, that for the duration of this course, all Input/Output Console information will be depicted with dark mode on.
Now that you are set up with an Online GDB account and have had a tour of the IDE application, let’s set up your first program.
Directions:
Step 1: If you haven't done so, select the Create New Project. Notice that a main.py file is created and has some initial code included.

Step 2: In the code editor pane, delete all the text that is above the code in line 9. That code should now exist on line 1.

Notice that on the left of the lines of code there are line numbers being displayed. These are not part of the code. They indicate the line numbers. This will be useful in the future.
Step 3: Click the "Run" button to see the code execute which will appear in the Input/Output Console.
Hello World
...Program finished with exit code 0
Press ENTER to exit console.
What happened? The program was compiled and executed in Online GDB. In doing so, since our code didn’t have any errors, it displayed the result of the print function on screen. Congratulations! You have written your first Python program, built it, and ran it. That is how easy it is!
Note: The green status note below the output is just that, a status. That the program finished with 0 error codes. And pressing the "Enter" key will exit you from the console. This status will always appear after any output, from now on, you will only see the actual output with any errors presented. We will not be including the program status notes in output.
Step 4: Now is a good time to save your project. Click the "Save" button and give your project a name. Again, this project will be saved to your My Projects tab.
Source: THIS CONTENT AND SUPPLEMENTAL MATERIAL HAS BEEN ADAPTED FROM “PYTHON FOR EVERYBODY” BY DR. CHARLES R. SEVERANCE ACCESS FOR FREE AT www.py4e.com/html3/ LICENSE: CREATIVE COMMONS ATTRIBUTION 3.0 UNPORTED.