Table of Contents |
One of the hardest concepts to become familiar with in CSS is the ability to use multiple selectors and selector types to achieve unique and advanced results. Compound selectors can be used to add selector specificity that affects only a very specific element, or to use one element to affect another. There are several types of selectors and modifiers that can have a wide range of effects on the selector’s behavior. CSS selectors can be divided into 5 categories:
| Selector Category | Description |
|---|---|
| Simple | Selects an element based on its tag name, id, or class |
| Combination | Selects elements based on a specific relationship, i.e., parent–child relationship |
| Pseudo-class | Selects elements based on an element’s specific state |
| Pseudo-element | Selects only part of an element |
| Attribute | Selects elements based on a particular attribute or attribute value |
Simple selectors use either a tag name, an element’s id value, or an element’s class value(s). Tag names are the simplest selector in that when you specify a tag name selector, any and all tags with that name will receive the style.
The following examples demonstrate how HTML code and CSS code can be used together to produce a desired output.
EXAMPLE
HTML code includes heading and paragraph tags:
<h1>Welcome!</h1>

<p>Lorem ipsum dolor sit amet</p>
EXAMPLE
CSS code includes heading and paragraph tag name selectors:
h1 {
    text-decoration: underline;
    color: #4287f5;
     }

p {
    text-decoration: underline;
    text-decoration-thickness: 10px;
    }
EXAMPLE
Output: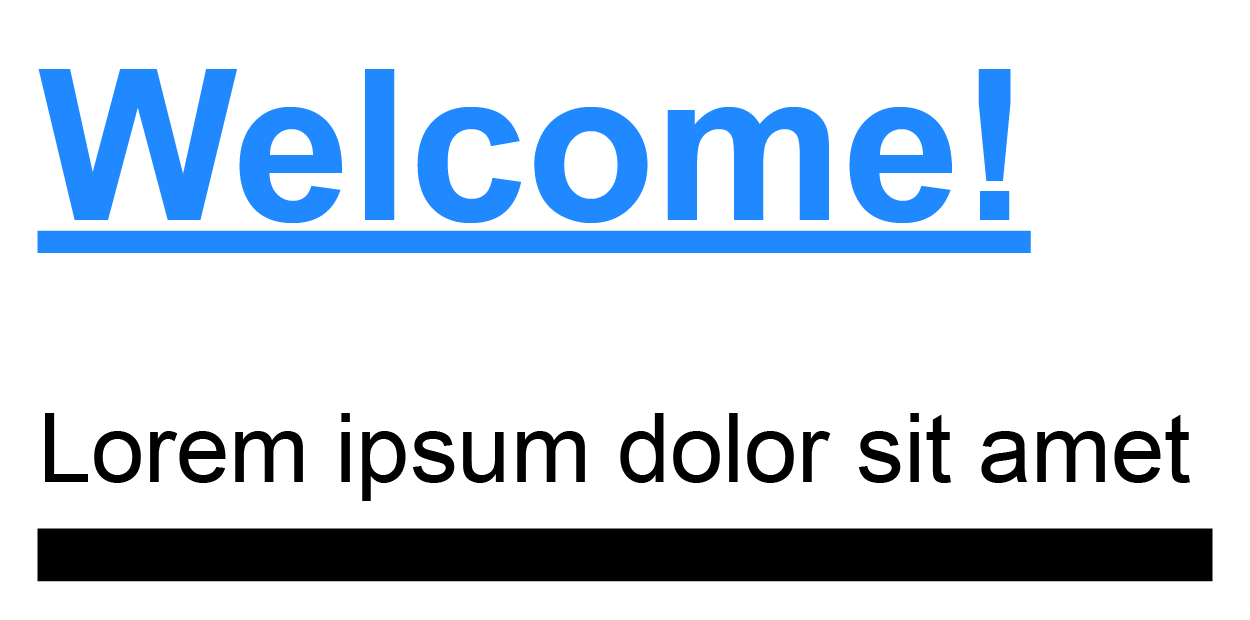
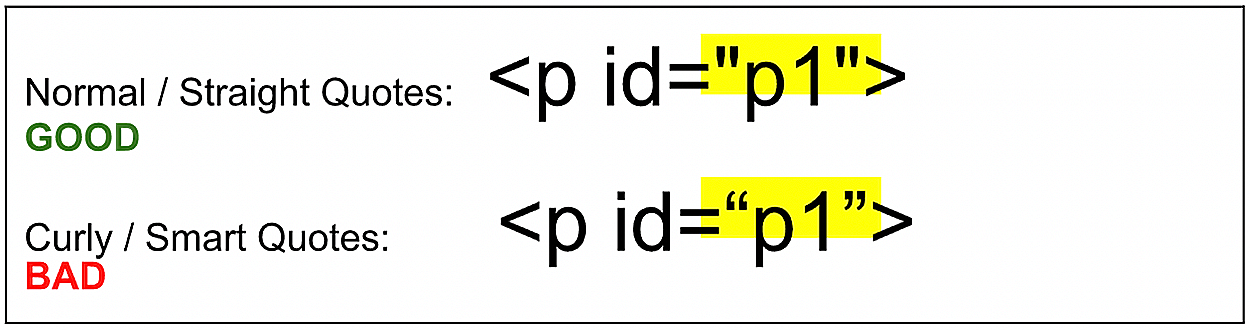
Use caution when copying and pasting code into any code editor as there are different types of quote mark characters, most of which cause problems when used within coding languages like HTML and CSS. If you ever noticed that quote marks in a Microsoft Word document have a slant in the direction of the text that it surrounds, these quotes are called “curly quotes” or “smart quotes” and are not recognized as code. However, if you type a set of quote marks in any code editor, you will notice that the quotes are straight, these are called “straight quotes” or “normal quotes” and are valid characters for coding.
As a general rule for new programmers and coders, it is strongly recommended that you retype the code yourself. Doing so builds muscle memory in your arms and hands, which is an important skill for becoming an effective programmer. Said another way, it is not just your brain that needs to learn how to program, your muscles need to learn as well.
Now that you know how to write and apply a simple CSS selector, it’s time to practice creating an HTML element and stylizing it with a simple CSS selector.
Directions:
1. Log into your StackBlitz account.
2. Create a new project from the starter templates, make sure to select "Static HTML/JS/CSS" to practice creating a simple selector using the code above.
EXAMPLE
Expected output:
3. In the index.html, locate and remove the text “Home Page” and replace it with an <h1>Welcome!</h1> element. Below the <h1> element, add a <p> and insert the “lorem Ipsum dolor sit amet” text in between the paragraph tags. Notice the changes in the output panel.
EXAMPLE
Expected output: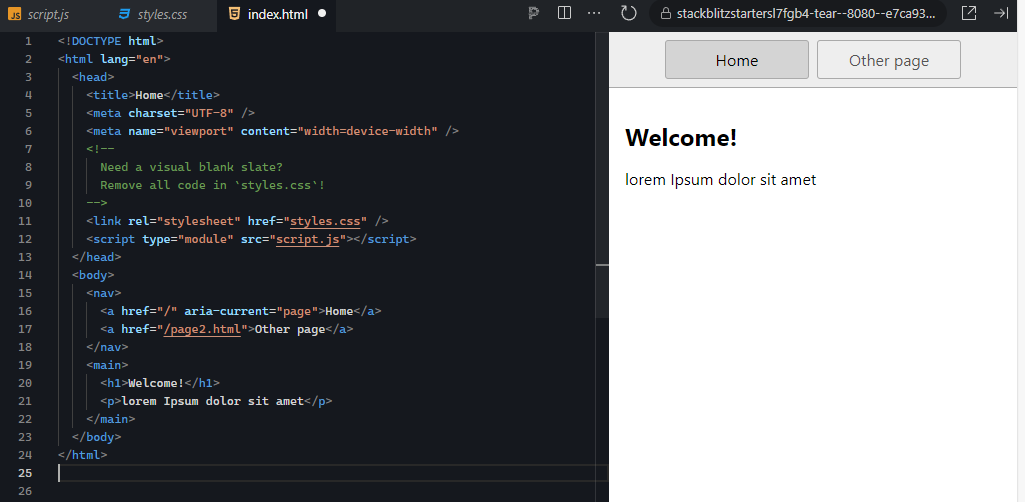
4. Open the stylesheet (style.css) and add a new style rule for the <h1>, set the text decoration to underline, and the color to any Hex color of your choice. You should now see your colored <h1> element with the underline.
EXAMPLE
Expected output: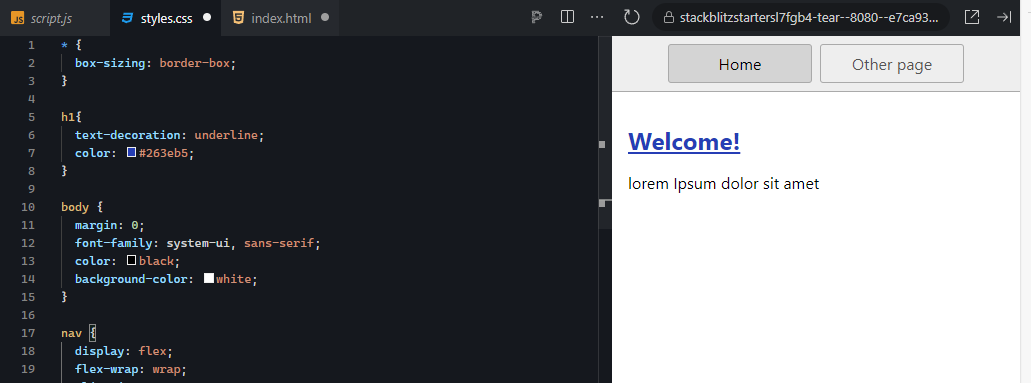
If you do not see the changes in the output view, double check if you have done the following.
EXAMPLE
Expected output: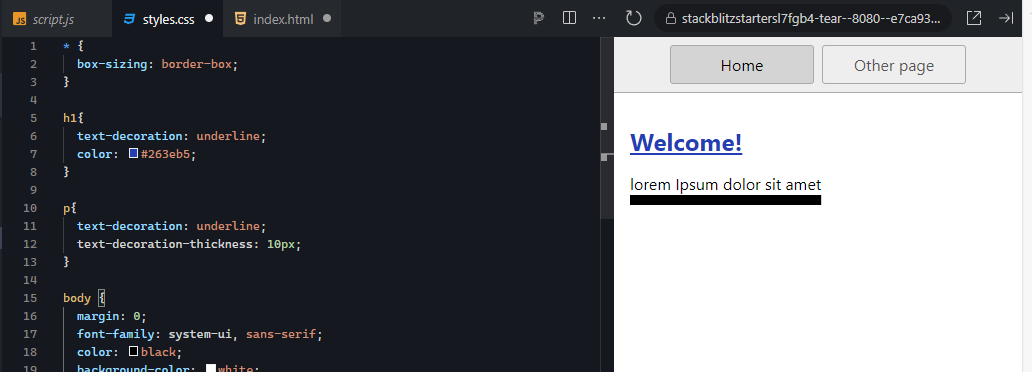
After completing this activity, notice how easy it is to connect your CSS styles to the HTML content using the simple tagname selectors. Additionally, the CSS properties that you used allowed you to not only add the underline decoration to the text, but you can also modify the appearance of the decoration itself.
You will create HTML elements and stylizing them with simple CSS selectors in Touchstone Task 2.2: Adding Style to the Webpages Using CSS.
Simple Selectors
CSS rule component that applies style properties based on an element’s tagname, id value, or class value.
ID selectors apply to the one element on the page that possesses the id attribute with the matching value. In the CSS code, the id selector is prefixed with the # symbol. In HTML, an id is a unique value given to an element’s id attribute, without the # symbol. Id selectors are ideal for when you need to stylize one element on a page and the style properties are different from the internal or external stylesheet. Each id selector can only be used once per page.
IN CONTEXT
One way you can remember that id selectors use the # symbol is that ids are often unique to each object and are only used once, much like a US citizen’s social security number. Ids can only be used once per webpage.
EXAMPLE
HTML code includes ID attribute p1<p id=“p1”>Lorem ipsum dolor sit amet, consectetur adipiscing elit, sed do eiusmod tempor incididunt ut labore et dolore magna aliqua. Ut enim ad minim veniam, quis nostrud exercitation ullamco laboris nisi ut aliquip ex ea commodo consequat.</p>
<p>Duis aute irure dolor in reprehenderit in voluptate velit esse cillum dolore eu fugiat nulla pariatur.</p>
EXAMPLE
CSS code includes ID selector #p1
#p1 {
     color: #660666;
     font-weight: bold;
       }
EXAMPLE
Output:Duis aute irure dolor in reprehenderit in voluptate velit esse cillum dolore eu fugiat nulla pariatur.
Now that you have seen how to create id selectors, it’s time to practice! Remember that when creating id selectors, the # symbol gets prefixed to the id value ONLY in the CSS stylesheet. When assigning a unique id to an HTML element in the HTML code, you do NOT include the # symbol, just the id value.
Note: At any time if you do not see the change occur, make sure to select the refresh button in the IDE.
Directions:
1. Return to your IDE and add a new paragraph element to the HTML content and fill it with any text, Lorem Ipsum is fine. Within the <p> element’s opening tag, add a space after the “p,” give it the “id” attribute and set it equal to “p1.”
EXAMPLE
Expected output: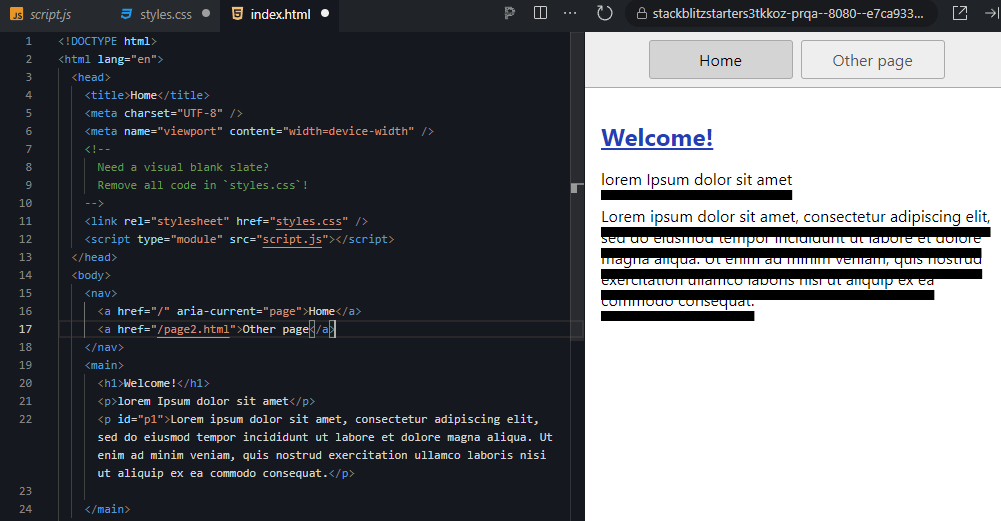
2. Next, open the stylesheet document and remove the text-decoration-thickness property and its value. Then, add an id selector “#p1” and give it the CSS properties and values of “color” and a value of “#660666” as well as “font-weight” and a value of “bold.”
EXAMPLE
Expected output: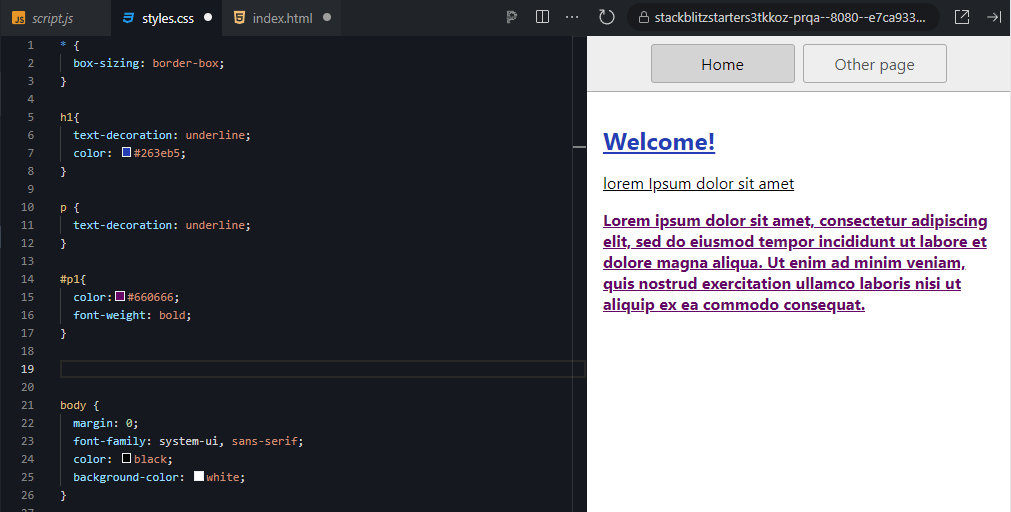
Troubleshooting tips:
Notice that the CSS style rule for the “p” tagname still affects the new paragraph and possesses an underline. However, because you uniquely identified the new (2nd) paragraph by giving it an id attribute and a value, you were able to apply specific additional style properties to just that one paragraph using the id selector.
Keep this in mind, the simpler the selector is, the broader the style will be applied. The more specific and complex the selector is, the style is applied more narrowly. Id selectors are pretty specific. In fact, there is a concept called “CSS Specificity” which assigns “specificity values” to style rules based on the type and combination of selectors present. Tagnames have a CSS Specificity value of 1, classes 10, ids 100, and inline styles 1000. Additionally, when you combine selectors, you add up the specificity values to get a total. When you have two conflicting CSS style rules, the rule with a higher specificity value wins and gets its style values applied.
ID Selectors
CSS rule component that applies style properties based on an element’s matching id value.
CSS Specificity
The total numeric value of a style rule as determined by the type and complexity of a CSS selector.
Class selectors apply the style to any element that contains the class attribute with the matching value. The difference between id and class selectors is that classes can be used multiple times in a single page whereas a specific id value can only be used once per page. Classes are ideal for when you need to apply a particular style to multiple elements throughout a page or the entire site.
EXAMPLE
HTML Code:
<ul>
     <li>Item 1</li>
     <li class="colorized">Item 2</li>
     <li>Item 3</li>
     <li class="colorized underlined">Item 4</li>
     <li>Item 5</li>
     <li>Item 6</li>
</ul>
EXAMPLE
CSS Code:
.colorized {
   color: #f50909a;
   }

.underlined {
    text-decoration: underline;
   }

ul {
    font-size: 2em;
   }
EXAMPLE
Output:To avoid using inline styles, use id selectors instead. Give the element an id attribute and value. Then, in the internal stylesheet for the page, create a style rule that uses the id of the element as the selector. This way the one special inline style rule is not hiding down in the body of code, but neatly located in the internal stylesheet.
ID selectors start with identifying the unique HTML element and then building the CSS style for the element.
Class selectors start with defining the unique CSS style, and then applying the class value to each HTML element you want to receive that style.
Think of a menu table on the menu page for a restaurant’s website. The menu table overall will be formatted differently than any tables elsewhere on the site, so you will give the menu table a unique id in the HTML and then go to the CSS code and stylize it using the id selector. Then, when you want to mark certain rows in the menu table as specials for the month, you create a class style rule in the CSS and then apply the class to the specific rows tags in the HTML.
Remember that when creating class selectors, the period gets prefixed to the class value ONLY in the CSS stylesheet. When assigning a class to HTML elements in the HTML code, you do NOT include the (.) period, just the class name.
Now that you have seen how to create class selectors, it’s time to practice!
Note: At any time if you do not see the change occur, make sure to select the refresh button in the IDE.
Directions:
1. Return to your IDE, open the stylesheet, and add a new style rule that uses the “.colorized” class selector. Add the color property and give it a value other than one you’ve already used. Create a separate style rule with “.underline” as the class selector.
EXAMPLE
Expected output: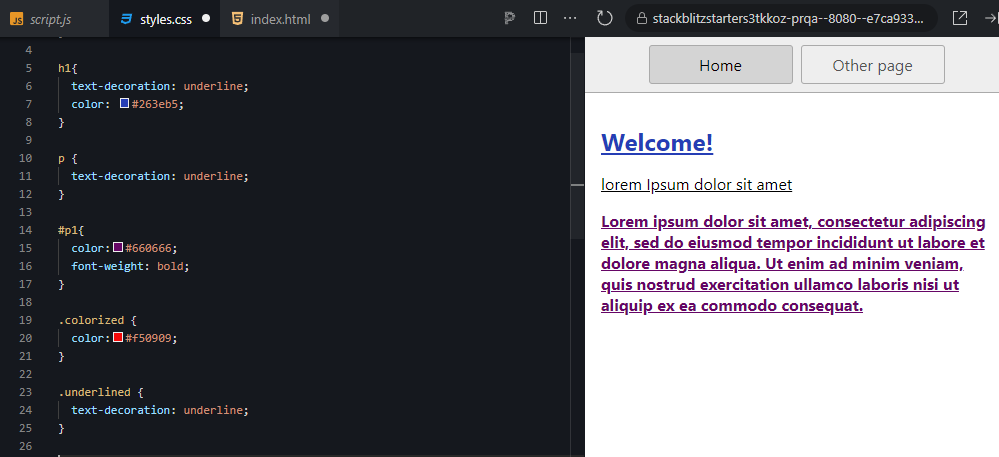
2. Open the HTML file and create a simple <ul> bulleted list and add at least 5 <li> list items to the list (make sure the <li> tags are located between the <ul> tags.
EXAMPLE
Expected output: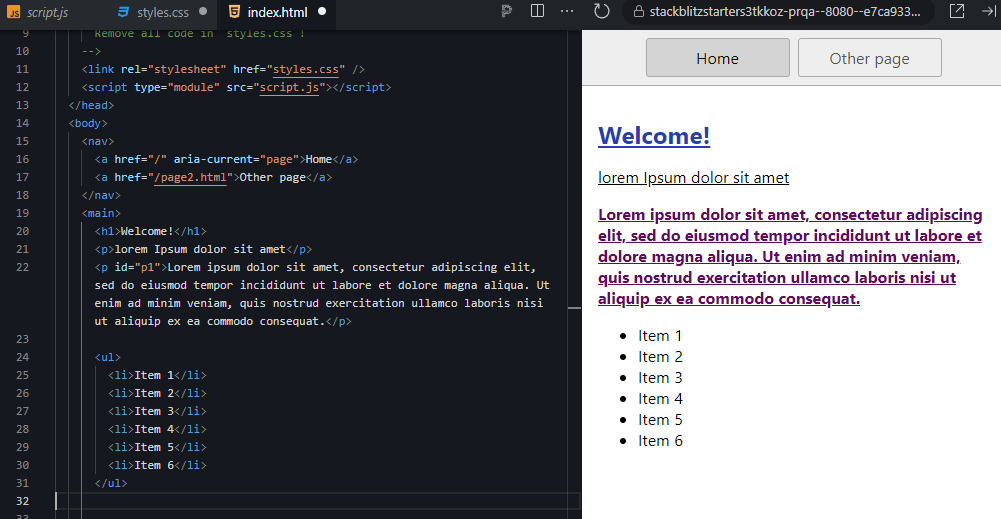
3. Pick any two of the <li> list items and in the starting tag of the </li>, add the “class” attribute and set it equal to “colorized.” Of the two items you assigned the “colorized” class to, pick one and add a space after the class value “colorized” and add the “underlined” class.
EXAMPLE
Expected output: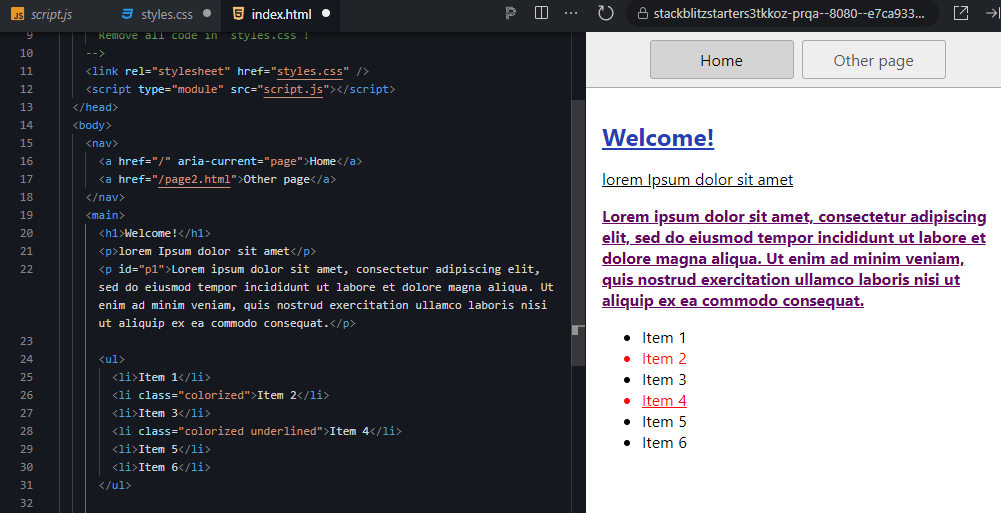
4. If you haven't already done so, now is a good time to rename your project and save it.
Remember, if you do not see the style take effect on the two list items, double check the formatting of your CSS style rule as well as the formatting of your class attribute in the list items starting tags. The CSS style rule should include the period prefixed to the selector class name and the class value given in the HTML should not include the period, only the class name.
Think about how you might use class selectors. Class selectors essentially give you a keyword to add to any element’s class attribute to apply a specific style. Class selectors are great for adding styles to any element we want, but they are also used for setting up a basic layout framework for yourself, similar to what Bootstrap does for developers.
Class Selector
CSS rule component that applies style properties based on an element’s matching class value.
Source: This Tutorial has been adapted from "The Missing Link: An Introduction to Web Development and Programming " by Michael Mendez. Access for free at https://open.umn.edu/opentextbooks/textbooks/the-missing-link-an-introduction-to-web-development-and-programming. License: Creative Commons attribution: CC BY-NC-SA.